Cedar Lawn Edging Installation: 7 Powerful Benefits in 2025
Creating a Clean Garden Edge with Cedar
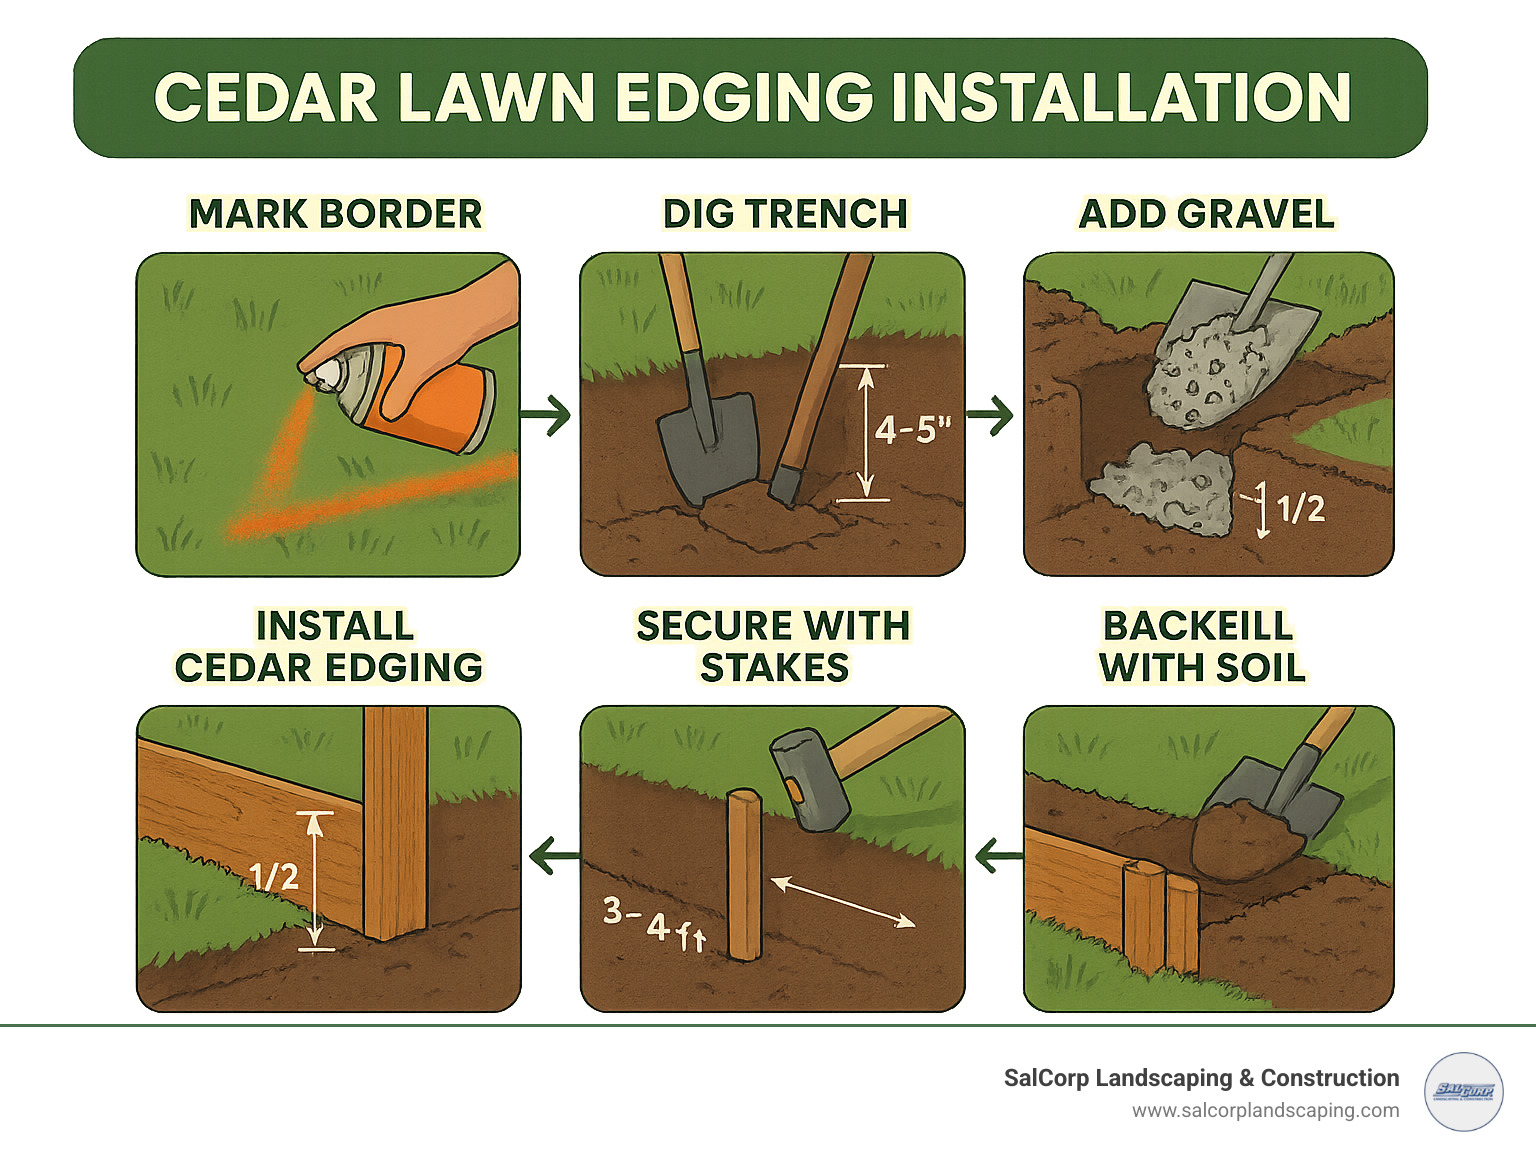
Cedar lawn edging installation is a straightforward DIY project that improves your landscape’s appearance while creating clean boundaries between lawn and garden beds. For those looking for quick installation steps:
- Mark your border with rope or paint
- Dig a trench 3-4 inches deep, 1-2 inches wider than edging
- Add 1 inch of gravel for drainage (optional)
- Install cedar edging with 1/2 inch above ground
- Secure with stakes every 3-4 feet
- Backfill and compact soil on both sides
Cedar edging offers natural beauty and practical benefits for Massachusetts property owners. As a naturally rot-resistant wood, cedar creates an attractive border that can last 5-10 years when properly installed and maintained. Unlike plastic alternatives, cedar blends harmoniously with landscape elements while providing a firm barrier between lawn and garden beds.
The warm, reddish-brown tones of new cedar gradually weather to a distinguished silver-gray if left untreated, though applying a wood sealer can preserve the original color and extend its lifespan. Cedar’s natural oils also provide some resistance to insects and decay, making it a practical choice for garden borders.
I’m Sal Musto, owner of SalCorp Landscaping & Construction, and I’ve installed countless cedar lawn edging installations throughout Massachusetts communities over my 20+ years in the landscape industry. My team and I have refined our cedar lawn edging installation techniques to ensure lasting results that improve your property’s curb appeal while effectively defining your outdoor spaces.
Similar topics to cedar lawn edging installation:
– installing landscape edging
– lawn installation services
– lawn service mulch installation
Why Choose Cedar: Benefits, Drawbacks & Style Options
When it comes to creating defined borders in your landscape, cedar stands out as a premium natural option. The aromatic oils present in cedar not only give it that distinctive pleasant scent but also serve a practical purpose by naturally repelling insects and resisting rot. This makes cedar particularly well-suited for the variable New England climate we experience throughout Massachusetts.
Main Benefits of Cedar Edging
There’s something special about working with cedar that plastic just can’t match. The warm, reddish-brown tones bring a natural elegance to any landscape design. But beyond its good looks, cedar offers practical advantages that make it worth considering for your edging project.
Cedar’s natural oils aren’t just responsible for that wonderful woodsy scent – they’re your garden’s built-in defense system. These oils actively repel insects and fight off rot, giving your edging a respectable 5-10 year lifespan without needing chemical treatments. For Massachusetts homeowners concerned about eco-friendly landscaping, cedar is a renewable resource that eventually returns to the earth naturally when its service life ends.
I’ve installed cedar edging in gardens from Walpole to Needham, and I’m always impressed by how it improves traditional New England landscapes. There’s something about that natural wood tone that just belongs in our region’s outdoor spaces, creating a perfect transition between manicured lawns and colorful garden beds.
Types of Cedar Products on the Market
When planning your cedar lawn edging installation, you’ll have several options to choose from:
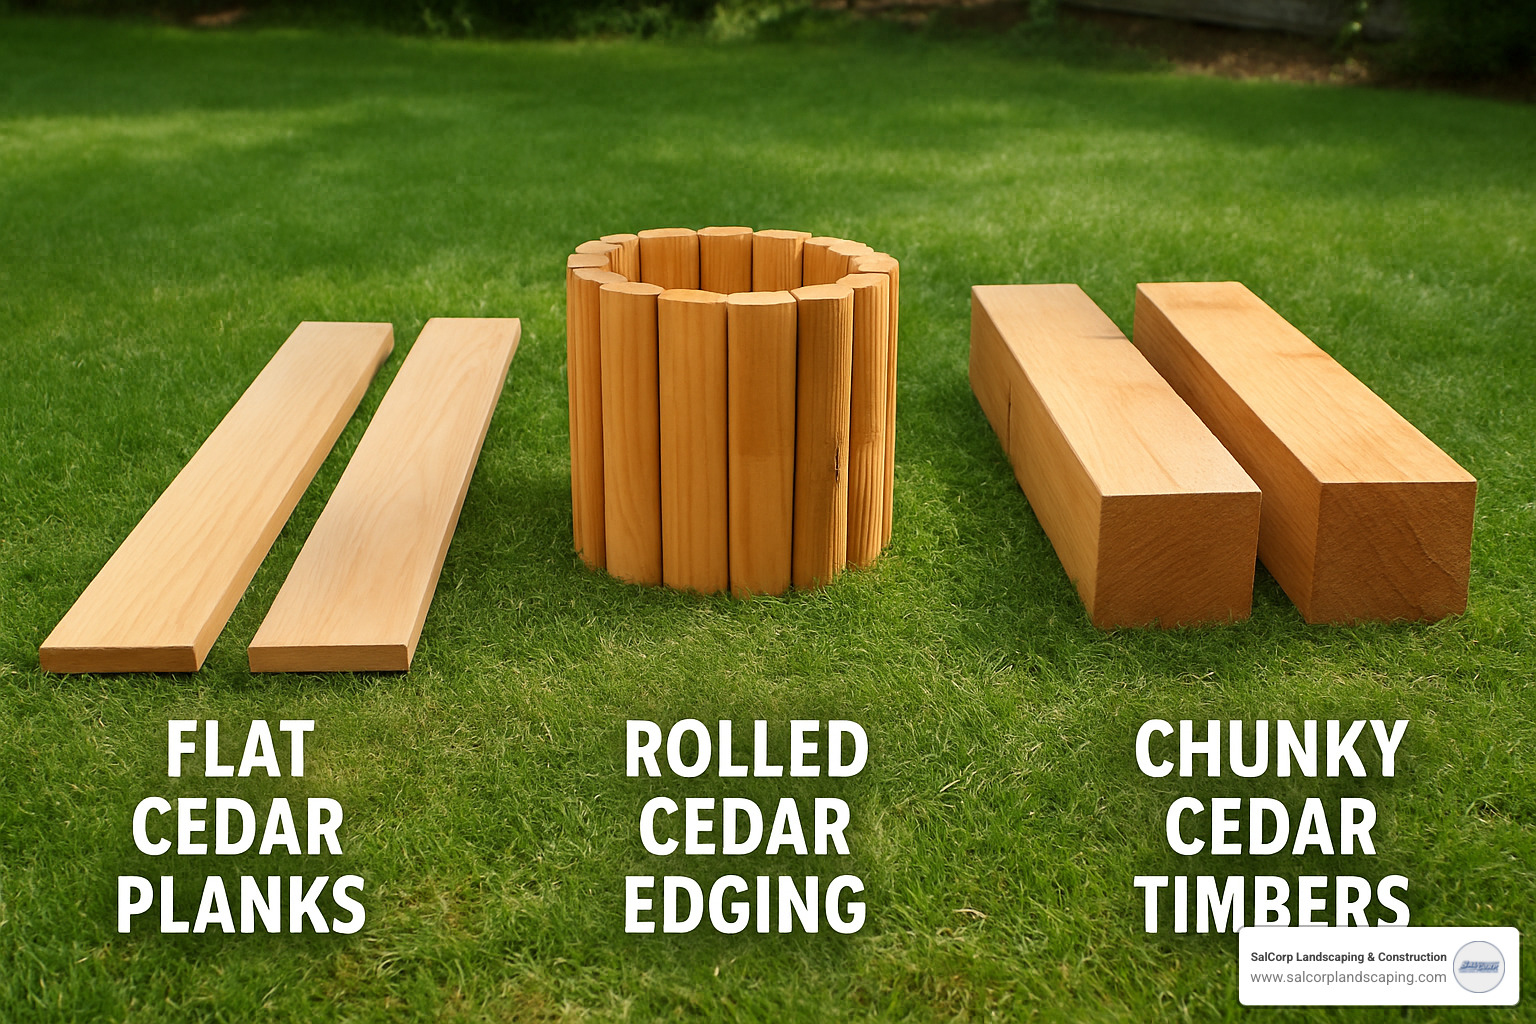
Cedar comes in various forms to suit different landscape needs. Cedar planks (typically 1×6 or 2×6) offer the most versatility for custom designs and work beautifully for straight runs or gentle curves when modified. Many of my clients prefer these for their clean, substantial appearance.
For those tricky curved garden beds, flexible cedar roll edging is a lifesaver. These pre-assembled rolls feature thin cedar slats connected by galvanized wire, allowing them to follow winding contours without breaking. They’re perfect for creating natural-looking borders around trees or flowing garden beds.
Need something more substantial? Cedar timbers (4×4 or 6×6) create borders with presence – they can even double as casual seating or help retain slightly raised beds. Just keep in mind these larger pieces work best in straight-line applications.
For a more decorative touch, cedar picket edging brings cottage-garden charm at 12-18 inches high. These create a mini-fence effect that adds character while keeping a natural wood aesthetic.
After two decades of landscape work across Massachusetts, I’ve found cedar planks offer the best balance of durability and design flexibility for most homes, while roll edging excels at handling those challenging curves.
Cedar vs. The Rest: Pros & Cons
Let’s be honest about how cedar stacks up against other edging materials:
| Material | Pros | Cons | Lifespan | Eco-Impact |
|---|---|---|---|---|
| Cedar | Natural appearance, rot-resistant, customizable, biodegradable | Requires maintenance, moderate lifespan | 5-10 years | Low (renewable, biodegradable) |
| Plastic | Inexpensive, flexible, lightweight | Artificial appearance, UV degradation, can heave in frost | 10-15 years | High (petroleum-based, non-biodegradable) |
| Metal | Long-lasting, clean lines, minimal maintenance | Can rust, expensive, limited design flexibility | 15-20+ years | Moderate (recyclable but energy-intensive) |
| Stone | Permanent, natural appearance, zero maintenance | Expensive, labor-intensive installation, difficult curves | 25+ years | Moderate (natural but non-renewable) |
Cedar brings unique advantages worth considering. If you grow vegetables, cedar is the safer choice – unlike pressure-treated lumber or certain plastics, it contains no chemicals that might leach into your garden soil. It’s also sourced from managed North American forests, making it a more sustainable option than imported hardwoods or petroleum products.
What about weed control? While no edging completely stops determined weeds (they’re persistent little things!), cedar creates a physical barrier that significantly slows grass runners and shallow-rooted weeds. Recent research on mulches and weeds suggests combining physical barriers with proper mulching for best results. I typically recommend pairing cedar edging with landscape fabric beneath mulch in adjacent beds for maximum effectiveness.
Cedar also handles our Massachusetts freeze-thaw cycles remarkably well. Its natural flexibility allows slight movement with the soil without cracking – something rigid plastic or concrete edging can’t claim.
One honest limitation: cedar edging won’t completely stop grass from growing through gaps or underneath. You’ll still need occasional string trimming along the edge, though much less frequently than with an undefined border.
For more information about materials that complement cedar edging in your landscape design, check out our guide to Landscape Materials Walpole MA.
Prep Like a Pro: Tools, Materials & Site Planning for cedar lawn edging installation
Proper preparation is the key to a successful cedar lawn edging installation that stands the test of time. Having installed countless cedar borders throughout communities like Wellesley, Newton, and Walpole, we’ve refined our preparation process to ensure lasting results.
Cedar Lawn Edging Installation Checklist
Before you head to the hardware store, let’s talk about what you’ll need to get this job done right. Trust me, there’s nothing worse than being elbow-deep in a trench and realizing you forgot something essential!
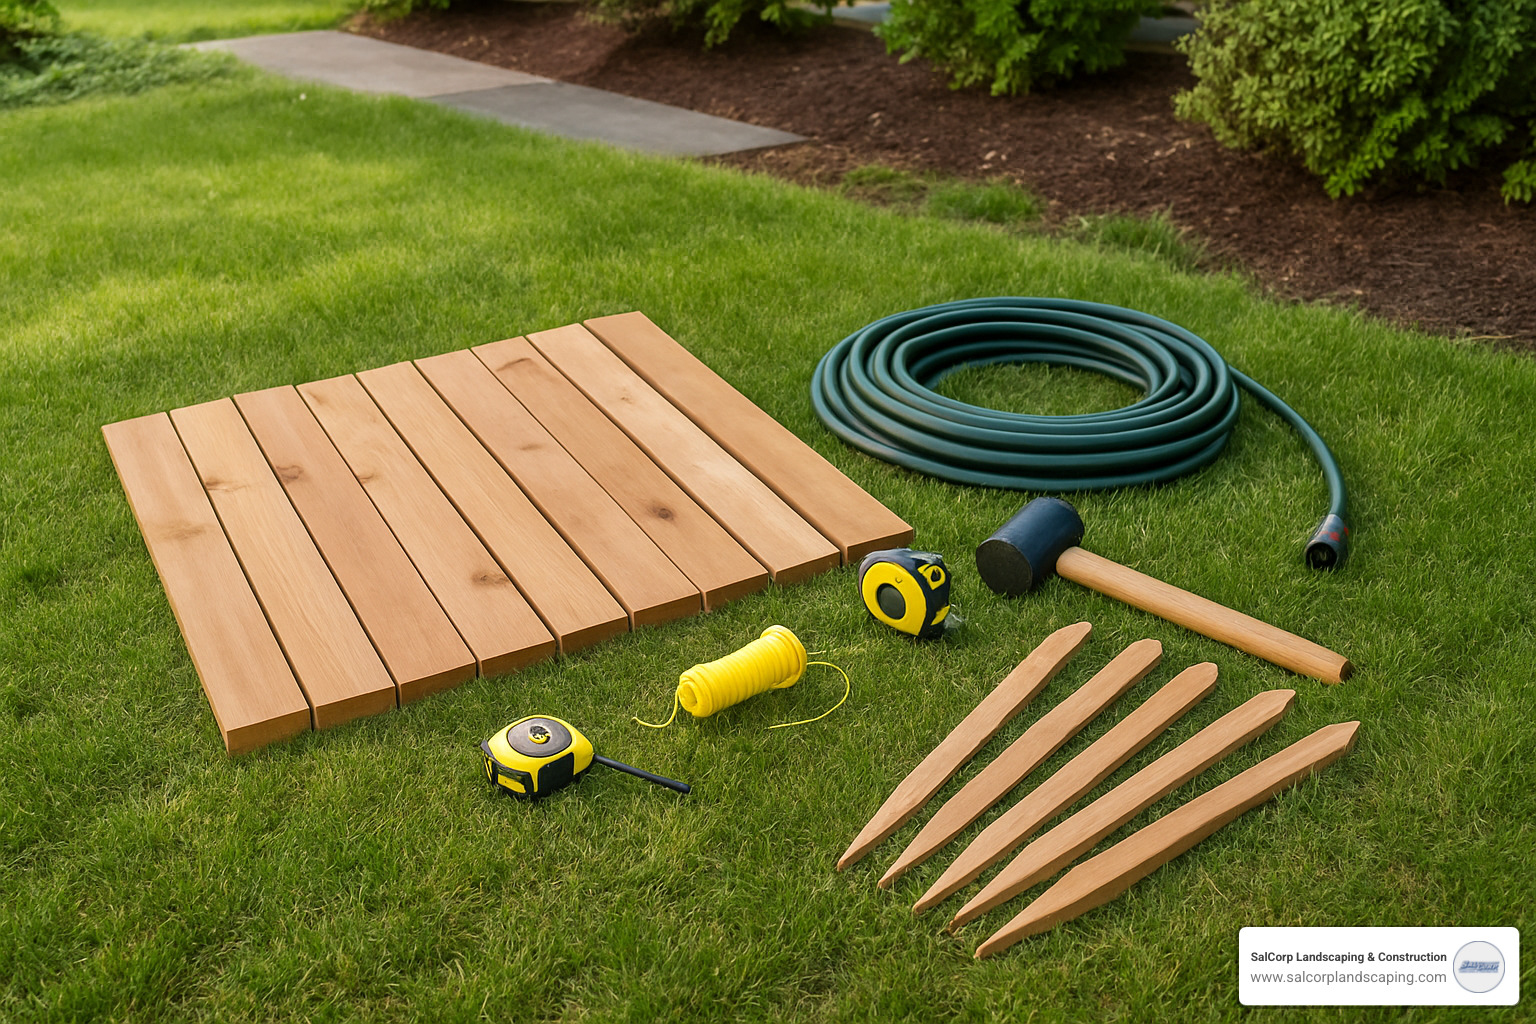
For tools, you’ll want a good measuring tape (at least 25 feet long) and some mason’s line or a garden hose to mark out your design. A spade or trenching shovel will be your best friend for digging that clean trench. When it comes to cutting cedar, a hand saw or circular saw with a fine-tooth blade works beautifully without splintering the wood.
Don’t forget your drill with a 3/8″ bit for creating holes for rebar pins, and a driver for screws. A carpenter’s level ensures your edging doesn’t look like a roller coaster, while a rubber mallet helps with gentle adjustments. If you’re working in an established lawn, a string trimmer helps clear grass before digging, and a tamper will compact soil firmly around your finished edging.
For materials, start with your cedar boards, rolls, or timbers – and always buy about 10% extra to account for waste and those inevitable measuring mishaps. Galvanized deck screws (2½” for planks, 3½” for timbers) resist rust in our New England weather. Galvanized mending plates or corner brackets create strong joints, while #3 rebar cut into 12″ lengths makes perfect anchoring stakes.
Optional but highly recommended materials include landscape fabric to suppress weeds, crushed stone or pea gravel for drainage (especially important in Massachusetts’ clay-heavy soils), and a quality wood sealer or stain to extend the life of your cedar.
Before you start digging, there are a few crucial steps that many DIYers overlook. Always call Dig Safe (811) before breaking ground – even for shallow trenches. Take time to assess your soil conditions, as they vary widely from sandy Cape Cod to rocky MetroWest. The moisture levels will affect how deep you need to install and what drainage solutions you might need.
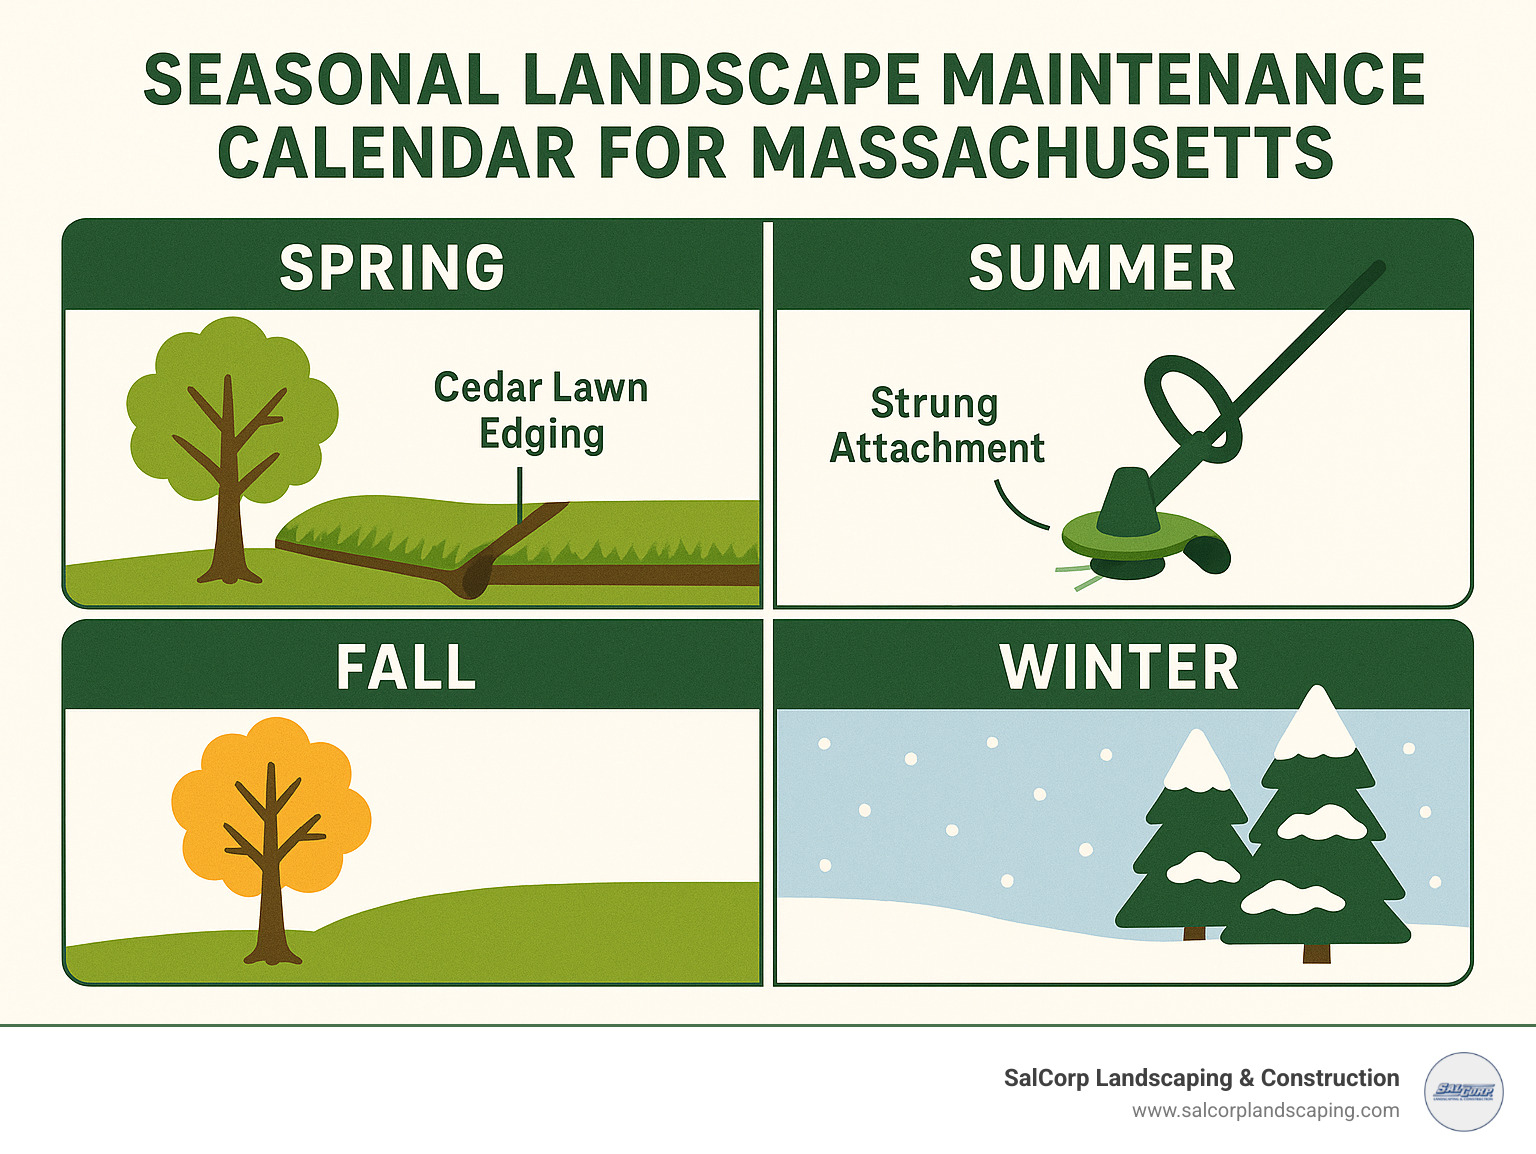
Timing matters too – early fall is ideal for cedar edging installation in Massachusetts, when soil is typically workable but not waterlogged. And don’t forget to plan for drainage, especially if you’re in low-lying areas like Norwell or Scituate where water tends to collect.
When working with cedar, protect yourself with gloves (those splinters are no joke!) and eye protection when cutting. Cedar dust can irritate some people, so a dust mask is a smart addition when sawing.
For more comprehensive information about landscape materials available in our area, check out our guide to Landscape Materials Walpole MA.
Finish Options: Bare, Stained or Sealed?
“To seal or not to seal?” That’s the question we hear most often from clients in communities like Brookline and Boston. Let me break down your three main options:
Natural (Untreated) cedar will gracefully weather to a lovely silver-gray color within 1-2 years – think of those classic New England beach cottages. This zero-maintenance option is perfect for naturalistic gardens, though it offers the shortest lifespan (typically 5-7 years in our Massachusetts climate).
If you love cedar’s warm, honey-amber tones, consider a semi-transparent cedar-tone stain. This preserves the natural color while still showing off the beautiful wood grain. You’ll extend your edging’s life by about 20%, though you’ll need to reapply every 2-3 years as New England weather takes its toll.
For maximum protection, a clear, oil-based wood sealer is your best bet. This invisible shield extends lifespan by approximately 30% without changing the appearance. I particularly recommend products containing UV blockers – our Massachusetts summer sun can be surprisingly intense!
For the longest-lasting results in our challenging New England climate, apply boiled linseed oil or quality oil-based sealer to all surfaces before installation. Pay special attention to the end grain, which acts like a straw to suck up moisture. Allow a full 24-48 hours of drying time before installation, and plan to reapply sealer annually each spring.
In my two decades of experience throughout eastern Massachusetts, properly sealed cedar edging typically lasts 7-10 years before requiring replacement, compared to 5-7 years for untreated cedar. That extra weekend of prep work really does pay off in the long run!
Cedar Lawn Edging Installation: Step-by-Step Guide
Now that you’ve gathered your materials and prepared your site, it’s time for the actual cedar lawn edging installation. Follow these steps for professional results that will improve your landscape for years to come.
Cedar Lawn Edging Installation Instructions
I’ve installed cedar edging in hundreds of Massachusetts gardens, and I can tell you that marking your border is where the magic begins. Take your time with this step – grab a garden hose or rope and lay out your design, stepping back frequently to view it from different angles. Once you’re happy with the flow, mark it with landscape paint and measure the total length (adding about 10% extra for waste and mistakes).
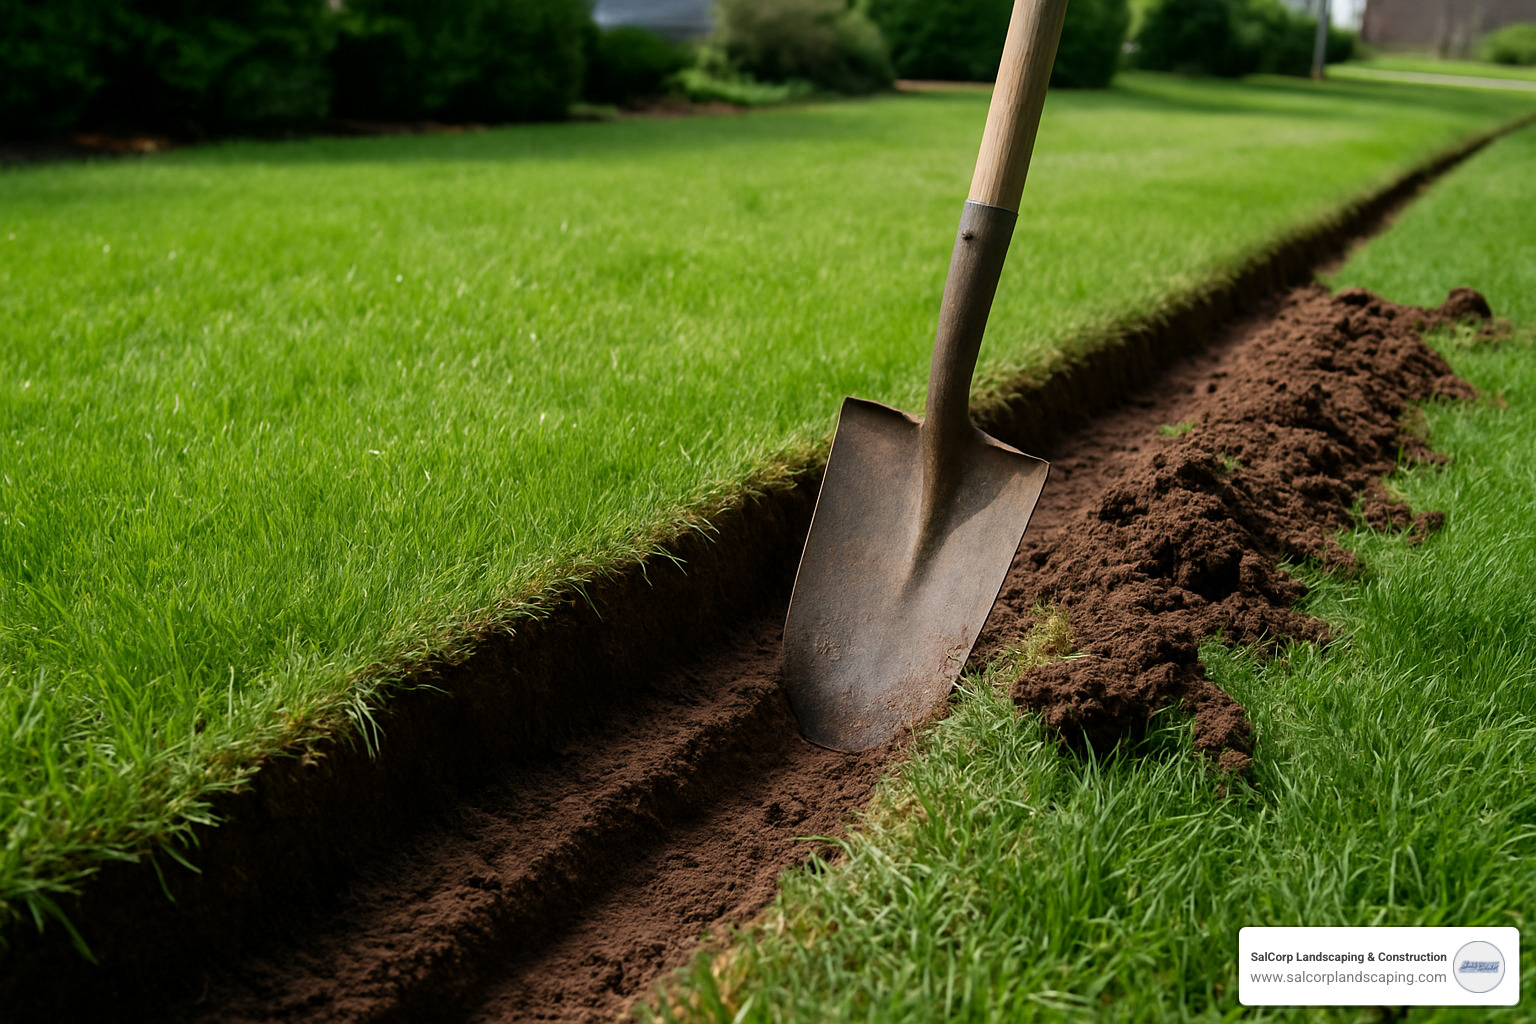
Next comes the trench work – arguably the most important part of your cedar lawn edging installation. Using a sharp spade or trenching shovel, cut vertically along your marked line to create a clean 3-4 inch deep trench. Make it slightly wider than your cedar pieces to give yourself some working room. In our New England soils, compacting the trench bottom is crucial – I like to use a tamper or even a scrap board to create a firm, level base.
For gardens in areas with heavy clay soil or poor drainage (I see this often in parts of Braintree and Quincy), add an inch of crushed stone or pea gravel before setting your cedar. This simple drainage layer can add years to your edging’s lifespan.
Before placing your cedar, take time to prepare each piece. Measure and cut to fit your border, pre-drilling holes for rebar pins approximately every 4 feet if using planks. I strongly recommend applying sealer to the bottom third of the boards – our Massachusetts freeze-thaw cycles can be brutal on untreated wood. Stage your cut pieces along the trench in order so installation flows smoothly.
When placing the cedar in the trench, position it so it sits about 1/2 inch above ground level. This slight elevation prevents mower damage while still looking tidy. Join straight sections using galvanized mending plates and screws, checking for level and alignment as you work. I like to partially backfill both sides as I go to hold everything in place.
Securing your edging properly is what separates amateur installations from professional ones. For cedar planks, insert rebar pins through those pre-drilled holes and hammer until flush. With roll edging, use the stakes provided or commercial edging stakes every 3-4 feet. Timber edging needs 12-inch rebar driven at an angle through pre-drilled holes. In frost-prone areas (which is basically all of Massachusetts!), place stakes closer together – every 2-3 feet is ideal.
Finish up by completely backfilling both sides, tamping the soil firmly as you go. A light watering helps settle everything, after which you might need to add a bit more soil. When applying mulch to adjacent beds, keep it about an inch below the top of your edging for a clean, professional look.
You can see more detailed instructions in this helpful how-to video on landscape edging installation.
Handling Curves and Corners Without Cracks
Creating smooth curves with cedar planks without splitting the wood is a skill I’ve refined over years of installations. For gentle curves, the secret is making kerf cuts – partial cuts on the back side of the cedar plank spaced about 1/4 inch apart. Cut only halfway through the thickness of the board, and it will magically flex around curves without breaking. Always place the kerfed side facing the inside of the curve.
When you need sharp corners, especially those crisp 90° turns, cut your boards at 45° angles (mitered) for a clean joint. Secure these corners with galvanized L-brackets on the inside faces, making sure to pre-drill holes to prevent splitting. A dab of waterproof wood glue between mitered edges adds significant strength.
Flexible roll edging is my go-to recommendation for properties in Concord and Sudbury, where flowing, naturalistic landscape designs are popular. These rolls simply bend to follow your desired contour, and for extremely tight curves, you can cut small V-notches in the top connecting wire. Just be sure to place stakes at the beginning and end of each curve for stability.
Common Mistakes to Avoid
After two decades of cedar lawn edging installation across Massachusetts, I’ve seen plenty of mistakes that can drastically reduce both appearance and lifespan. Digging a trench that’s too shallow (less than 3 inches) is probably the most common error – without adequate depth, your edging will inevitably tilt or heave during our notorious freeze-thaw cycles.
Many DIYers skip the drainage layer in clay-heavy soils, which is like inviting rot to dinner. That small layer of gravel makes a huge difference in how quickly water moves away from the wood. Similarly, neglecting to seal the end-grain of your cedar is a missed opportunity – those cut ends absorb moisture much faster than the sides and are often the first place deterioration begins.
Height matters too – set your cedar flush with the ground and you’ll be replacing damaged sections after the first mowing; set it too high and you’ve created both a tripping hazard and a mowing nightmare. The sweet spot is about 1/2 inch above grade.
I’ve seen many DIY installations where homeowners tried to bend solid cedar planks into tight curves without kerf cuts – the inevitable splitting wastes both material and time. Equally problematic is connecting cedar pieces end-to-end without proper joining plates, creating weak points that separate after the first winter.
Perhaps the most overlooked aspect is proper anchoring. Our Massachusetts winters cause significant ground movement, and skimping on stakes or rebar pins leads to edging that shifts, heaves, or completely pops out of the ground by spring.
By avoiding these pitfalls, your cedar lawn edging installation will maintain both its structural integrity and visual appeal through many New England seasons, creating that perfect definition between your lawn and garden beds that makes landscapes look professionally maintained.
Aftercare: Maintenance, Lifespan & Costs
Keeping your cedar edging looking great isn’t complicated, but it does require some attention. Having worked with countless Massachusetts homeowners over the years, I’ve seen how proper maintenance can dramatically extend the life of your investment.
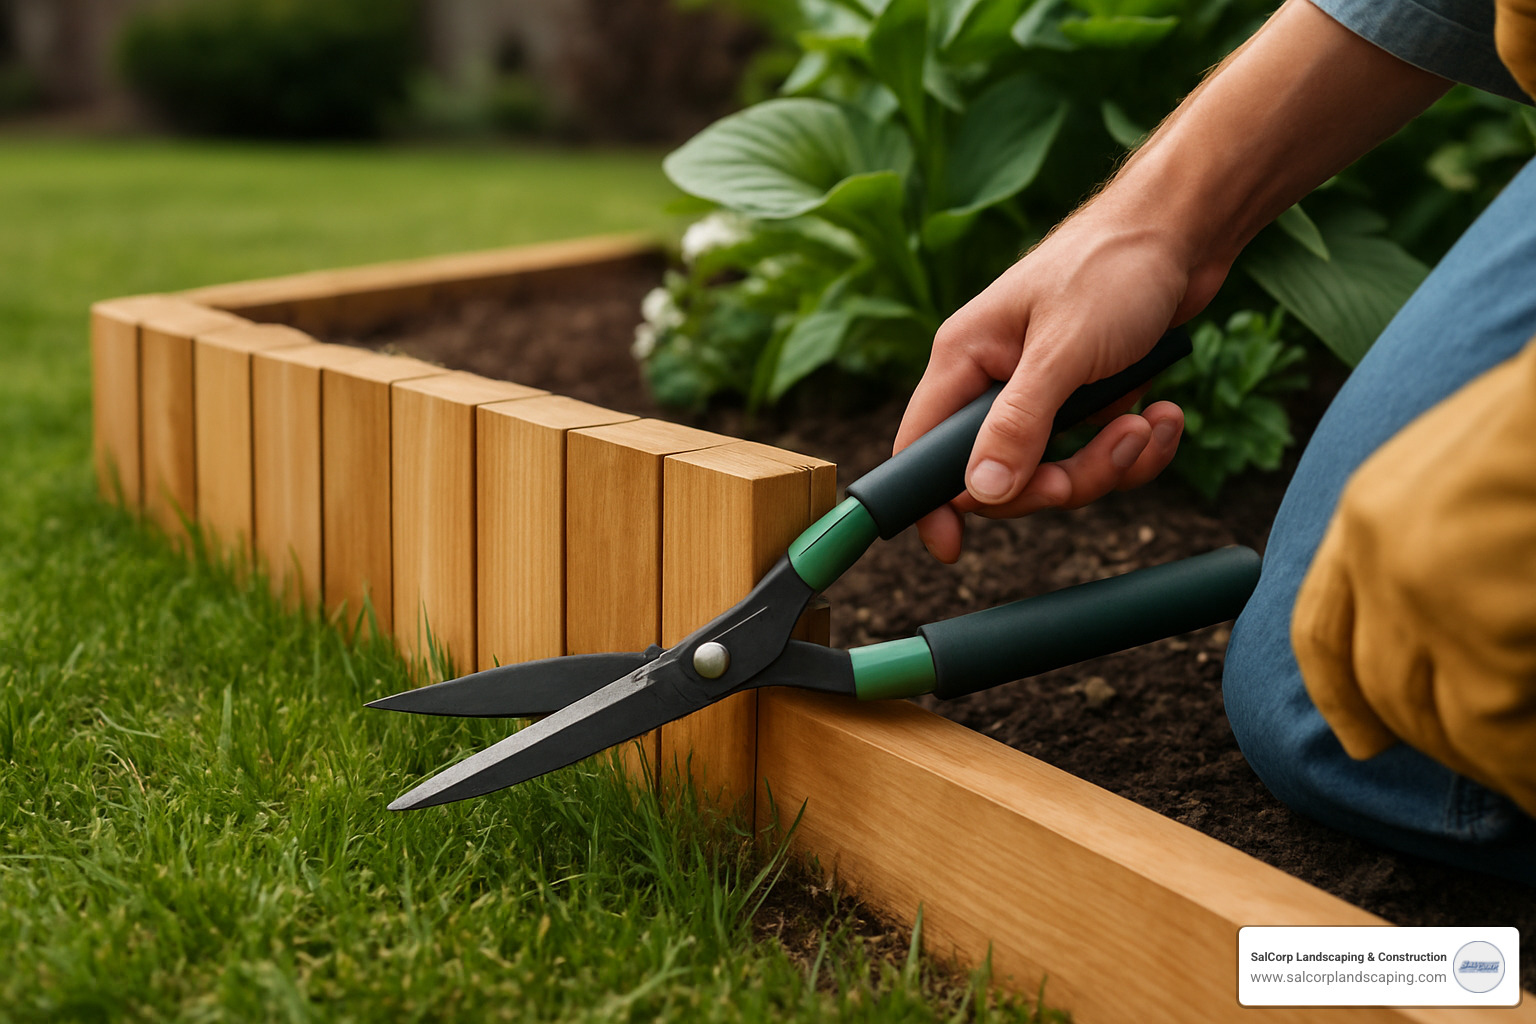
Your new cedar lawn edging installation deserves some TLC throughout the seasons. During the growing months, be gentle when trimming grass along the border—string trimmers are notorious for damaging wood edges! I always recommend using a shield attachment or simply taking it slow when you’re working near the cedar.
After our Massachusetts winters (and we know how tough those can be), take a spring walk around your property to check for any sections that might have shifted during freeze-thaw cycles. This is especially important if you live in areas with clay-heavy soil like parts of Framingham or Natick. A quick reset of displaced sections can prevent bigger problems down the road.
For longevity, consider giving your cedar a gentle cleaning once or twice a year using just a soft brush to remove any moss or algae—particularly common in shaded areas of your yard. And if you opted for sealed cedar, an annual inspection and fresh coat of sealer can work wonders for extending its lifespan.
Speaking of lifespan, what can you realistically expect? Based on our installations throughout eastern Massachusetts, untreated cedar typically lasts 5-7 years, while properly sealed cedar can reach 7-10 years. If you’ve gone the extra mile with both sealer and excellent drainage, you might enjoy your edging for 8-12 years before replacement becomes necessary.
Your location matters too. Homeowners in coastal communities like Scituate may see slightly shorter lifespans due to salt exposure, while those in well-drained inland areas often exceed these estimates.
When it comes to costs, cedar lawn edging installation represents a range of investment options. Based on internet averages (not SalCorp pricing), DIY installation typically runs $2-$8 per linear foot, while professional installation ranges from $8-$25+ per linear foot. These wide ranges reflect differences in cedar quality, property conditions, design complexity, and regional factors.
One thing I love about cedar is its eco-friendly profile. Unlike some alternatives, cedar is safe around vegetable gardens, pets, and children. It contains no harmful chemicals—just natural oils that resist decay without toxicity. For environmentally conscious homeowners in communities like Cambridge, cedar’s biodegradability and renewable sourcing make it an appealing choice over plastic options.
Reviving Aging Edging
Has your cedar started showing its age but isn’t quite ready for replacement? I’ve helped many homeowners breathe new life into their borders with some simple techniques.
A light sanding with 80-grit sandpaper can work wonders, removing that weathered gray surface to reveal fresh cedar underneath. Follow this with a new coat of oil-based sealer, and you’d be amazed at the change! For sections that have shifted, simply dig around the displaced areas, reposition them, and add new stakes if needed.
I’ve seen these revival methods add 2-3 years of life to aging cedar edging throughout Norfolk and Middlesex counties. It’s remarkable what a little attention can accomplish.
What If Boards Rot or Come Loose?
Even with the best care, you’ll eventually face some repairs. When you spot localized rot, don’t panic! Simply remove the affected boards by pulling the stakes or pins, replace with matching new cedar (pre-treated with sealer), and secure with fresh stakes.
For loose sections, expose the bottom of the edging by removing some soil, check for broken stakes, reposition everything properly, and consider adding extra stakes for reinforcement. I always recommend doubling the original number of stakes in problem areas—it’s a small effort that pays big dividends.
When should you consider a full replacement? In my experience working with properties throughout eastern Massachusetts, it’s time when more than 30% of boards show significant decay, when severe shifting has occurred due to root growth or frost heave, or when you’re simply ready for a fresh look.
For homeowners in communities like Wellesley or Dover, where landscape aesthetics are particularly valued, I often suggest considering replacement around the 7-8 year mark, even if the edging is still functional.
When that time comes, consider some potential upgrades: thicker boards for extended lifespan, landscape fabric beneath the gravel for improved drainage, or perhaps even a French drain alongside the edging in particularly wet areas. These small improvements can make a big difference in how long your next cedar lawn edging installation will serve your landscape.
“More info about Hardscape Ideas”
Frequently Asked Questions about Cedar Lawn Edging
Over my years installing cedar lawn edging throughout Massachusetts communities, I’ve noticed homeowners tend to ask similar questions. Let me share the most common ones along with honest, practical answers based on real-world experience in our New England climate.
How long will cedar edging really last in wet New England soils?
The reality of Massachusetts soil conditions means untreated cedar typically survives 5-7 years before significant deterioration occurs. With proper installation (including that important drainage gravel layer), regular maintenance, and protective sealing, you can reasonably expect 7-10 years of service.
Your specific location in Massachusetts actually makes a big difference. Cedar lasts longer in the sandy soils of Cape Cod than in the clay-heavy soils common in MetroWest communities. Other factors that impact longevity include how much your irrigation system hits the edging, our notorious freeze-thaw cycles (more severe in inland areas), sun exposure (south-facing edges deteriorate faster from UV damage), and proximity to salt for coastal properties.
For the best possible lifespan in our challenging New England conditions, I recommend using cedar that’s at least 3/4″ thick, ensuring proper drainage beneath, and committing to annual sealing. These simple steps can add years to your investment.
Should I stain, seal or leave cedar edging natural?
This really comes down to your personal priorities and maintenance comfort level.
If you’re someone who appreciates low-maintenance solutions, the natural weathering approach might be perfect. The silver-gray patina that develops has its own rustic charm, and you won’t be committing to regular upkeep. This works well if you’re planning to replace the edging within 5-7 years anyway.
For homeowners who love that warm, reddish cedar tone, staining is your friend. You’ll need to reapply every 2-3 years, but you’ll maintain that rich color that complements many traditional New England landscape designs. This approach works particularly well when you want to match other wooden elements in your yard.
In my experience working with properties throughout eastern Massachusetts, clear sealing offers the best balance for most homeowners. It preserves the natural look while extending lifespan, though it does require annual maintenance. The extra few years you’ll get from your edging often justifies the minimal effort involved.
Does cedar lawn edging stop grass and weed runners?
I wish I could tell you cedar edging creates an impenetrable barrier, but the honest answer is that it slows—not completely stops—grass runners and weed encroachment.
To maximize effectiveness, make sure your cedar lawn edging installation includes placing the boards at least 3 inches deep, with the top edge extending 1/2 inch above soil level. Many of my clients in Walpole and Sharon have found that combining cedar edging with a 2-3 inch deep V-shaped trench on the lawn side creates an even more effective barrier against aggressive lawn grasses.
For particularly problematic areas, consider adding landscape fabric along the garden side. While no edging system completely eliminates maintenance, properly installed cedar edging significantly reduces how often you’ll need to clean up those edges compared to having no defined border at all.
How does cedar edging hold up to string trimmers?
This is a great question that not enough people consider before installation! Cedar’s soft wood fibers make it particularly vulnerable to string trimmer damage. Those spinning strings can quickly erode the wood, leaving unsightly gouges that collect water and accelerate rot.
To protect your investment, I recommend using a string trimmer shield attachment and reducing your trimmer speed near the edging. Some of my more meticulous clients in Newton and Wellesley install a narrow strip of decorative stone alongside their cedar edging as a buffer zone—this looks attractive and eliminates the need for trimming right against the wood.
Maintaining proper edging height (that 1/2 inch above soil we talked about) also makes trimming easier and reduces the chance of accidental damage. For those particularly concerned about trimmer damage, consider capping cedar edging with a thin metal strip, though this does change the natural aesthetic.
Can I install cedar edging in winter?
While technically possible, I don’t recommend cedar lawn edging installation during Massachusetts winters for several practical reasons.
Our frozen ground makes proper trenching somewhere between difficult and impossible, depending on the winter. Cold temperatures also affect wood properties, potentially causing splitting during installation. Proper soil compaction becomes challenging in freezing conditions, and any sealers or stains you might want to apply require minimum temperatures to cure properly.
The ideal installation windows in Massachusetts are mid-spring (April-May) after soil has thawed but before summer heat hits, or early fall (September-October) when soil is workable but not waterlogged. These periods give you the best conditions for a successful installation that will last for years.
If you’re planning a landscape renovation in Boston, Newton, or surrounding communities, I’d recommend scheduling your cedar edging work during these optimal periods for the best results.
Conclusion
Cedar lawn edging installation represents an excellent investment in your property’s appearance and landscape definition. The natural beauty of cedar complements virtually any Massachusetts landscape style, from colonial Concord properties to contemporary Boston suburban homes.
When properly installed and maintained, cedar edging offers:
* A clear, attractive boundary between lawn and garden areas
* Natural resistance to insects and decay
* An eco-friendly alternative to plastic edging
* A warm, organic aesthetic that improves curb appeal
While cedar edging requires more maintenance than some alternatives and will eventually need replacement, its natural appearance and environmental benefits make it a superior choice for discerning homeowners.
At SalCorp Landscaping & Construction, we’ve been installing cedar lawn edging throughout Massachusetts communities for over two decades. Our owner-operated approach ensures that every installation receives the attention to detail necessary for lasting results. From the sandy soils of Cape Cod to the rocky terrain of MetroWest, we understand how local conditions affect cedar performance and adjust our installation techniques accordingly.
Whether you’re considering a DIY installation using our guidelines or would prefer professional assistance, proper preparation, quality materials, and attention to maintenance will ensure your cedar edging improves your landscape for years to come.
For more information about professional landscape services, including expert cedar lawn edging installation, visit our website or contact us directly. Our team serves communities throughout eastern Massachusetts, including Walpole, Boston, Needham, and surrounding areas.
