How Long Does It Take to Install a Paver Patio? Top Tips
Introduction
How long does it take to install a paver patio? The short answer is: it usually takes over one day, but the exact duration can vary. Here’s a snapshot of the time involved for a typical patio installation:
- Preparation: 1-2 days
- Base and sand layers: 1 day
- Laying pavers: 1-2 days
- Finishing touches: 1-2 days
In total, expect the complete process to take about 4-7 days for an average-sized patio.
Now let’s dive into the details.
Understanding the timeline for installing a paver patio helps you plan your project better. This task involves several steps—each crucial for a long-lasting and beautiful result. Preparation begins with marking the area, clearing grass and soil, and ensuring proper drainage.
Then comes the base: adding gravel, compacting it, and leveling the sand. The actual laying of pavers is next—precision is key here, followed by final touches like adding edging and filling joints.
Weather conditions also play a big role. A rainy week can set back your progress, turning a weekend project into a week-long endeavor.
Whether you’re doing it yourself or hiring a pro, understanding these steps can save time and money.

How Long Does It Take to Install a Paver Patio?
When planning a paver patio, one of the first questions that comes to mind is, “how long does it take to install a paver patio?” The answer depends on several key factors.
Factors Influencing Installation Time
Project Scope: The size and complexity of your project are crucial. A small, simple patio might take just a couple of days, while a large, intricate design can stretch over a week.
Paver Material: Different materials have different installation times. For example, natural stone pavers can take longer to install than concrete pavers due to their irregular shapes.
Weather Impact: Weather can be a major factor. Rain can delay your project, making the ground too muddy to work on. Always check the forecast before starting.
Existing Base Material: If the existing base material is uneven or unstable, it will need to be removed and replaced with a solid foundation, adding extra time.
Pre-Installation Preparations
Clearing Area: Start by marking the perimeter of your patio area. Use a spade and shovel to clear grass, dirt, and any debris. This can take a full day, depending on the size of the area.
Base Preparation: Next, add a 6-inch layer of gravel. Compact it using a tamper or a plate compactor. This step is crucial for stability and can take another day.
Sand Leveling: Spread a 1-inch layer of sand over the gravel. Use electrical conduit and a 2×4 board to level the sand. This ensures a smooth surface for laying the pavers.
Installation Day
Laying Pavers: Start at a corner and work your way out. Lay each paver carefully, following your design pattern. This step can take anywhere from one to several days, depending on the size and complexity of your patio.
Cutting Pavers: Use a diamond blade paver saw to cut pavers for edges and corners. This step is time-consuming but essential for a polished look.
Adding Edging: Finally, add edging to keep the pavers in place. Spread jointing sand over the pavers and sweep it into the gaps. Compact the entire patio to secure the pavers.
Each of these steps is crucial for a successful paver patio installation. While a professional team might complete a 300 sq ft patio in 2-3 days, a DIY project could take up to a week or more.
Understanding these factors can help you plan your project timeline more effectively. Now, let’s dive into how to plan your paver patio project to ensure everything goes smoothly.
Planning Your Paver Patio Project
DIY Installation: What to Expect
When planning a DIY paver patio installation, timing is everything. The best time of year to start your project is during the spring or fall. These seasons offer mild weather, which is ideal for outdoor work and ensures your materials set properly.
Tools Needed:
– Spade shovel
– Metal rake
– Wheelbarrow
– Hand tamper
– Tape measure
– Rubber mallet
– Layout stakes
– String line
– Line level
– Spray paint
– 8″L 2 x 4 board
– Conduit pipes (8″ long, 3/4″ wide)
– Knee pads
– Steel mallet
– Broom
– Leaf blower
– Garden hose
– Plate compactor (rentable)
– Diamond blade paver/block saw (rentable)
– Eye and hearing protection
– Respirator
Skill Level and Time Commitment:
A DIY paver patio project is intermediate in difficulty and can be physically demanding. According to Joe Raboine, VP of Design at Belgard, having an extra set of hands can make the process smoother. Expect to spend around 6-14 days on the entire project, depending on your patio’s size and complexity.
Hiring Professionals: What to Look For
If the thought of DIY feels overwhelming, hiring professionals might be the best route. Here are some key aspects to consider when choosing a professional service like SalCorp Landscaping & Construction:
Experience:
Look for a company with years of experience in paver patio installations. Experienced professionals can prevent costly mistakes and ensure high-quality results.
Portfolio:
Review their portfolio to see past projects. This will give you an idea of their style and expertise. A diverse portfolio indicates versatility and skill.
Reviews:
Check online reviews and testimonials. Positive feedback from previous clients is a good indicator of reliable service.
Scheduling Considerations:
Professionals typically have busy schedules, especially during peak seasons. Book your project well in advance to secure a spot.
SalCorp Landscaping & Construction:
SalCorp offers comprehensive landscape design services, including paver patio installations. Their expertise ensures your project is completed efficiently and to a high standard.
By understanding the timeline and preparation steps, you can make an informed decision on whether to tackle the project yourself or hire professionals. Both options have their own set of benefits and challenges, so choose what best suits your needs and capabilities.
Next, let’s discuss the maintenance and care for your new paver patio to keep it looking great for years to come.
Maintenance and Care for Your New Paver Patio
Maintaining your paver patio is essential to keep it looking beautiful and functional for years. Here are some key tips on sealing, cleaning, and repairing your new patio.
Sealing Pavers
Sealing your pavers acts like a protective barrier. It helps prevent water damage, stains, and color fading. Most experts recommend sealing your pavers every 2-3 years.
- Choose the right sealant: Make sure to use a sealant recommended by your paver manufacturer.
- Apply evenly: Use a roller or sprayer to apply the sealant evenly across the surface.
- Allow proper drying time: Ensure the sealant dries completely before using the patio. This usually takes about 24-48 hours.
Cleaning Tips
Regular cleaning keeps your paver patio looking fresh and new. Here’s how to do it right:
- Sweep regularly: Use a broom to sweep away dirt and debris.
- Use a gentle wash: A garden hose with a gentle spray is often enough. For tougher stains, a mild detergent and a scrub brush can help.
- Avoid harsh chemicals: These can damage the pavers. Stick to paver-safe cleaners.
Repairing Pavers
Even the most well-maintained patios might need repairs over time. Here’s how to handle common issues:
- Replace damaged pavers: If a paver cracks or chips, remove it carefully and replace it with a new one.
- Re-sand joints: Over time, the sand between pavers can wash away. Refill the joints with polymeric sand to keep weeds out and prevent shifting.
- Fix sinking spots: If you notice areas where pavers are sinking, it might be due to a base issue. Lift the pavers, add more base material, and compact it before replacing the pavers.
By following these maintenance tips, you can ensure your paver patio remains a beautiful and functional part of your outdoor space for years to come. Regular care might seem like a bit of effort, but it’s worth it to extend the life and look of your investment.
Next, let’s dive into frequently asked questions about paver patio installation to clear up any remaining doubts.
Frequently Asked Questions about Paver Patio Installation
How much does it cost to install a paver patio?
The cost of installing a paver patio can vary widely based on several factors. Generally, you can expect to pay between $12 to $20 per square foot. This range depends on the material you choose and the complexity of the design.
For example, flagstone and fieldstone are more expensive than brick or concrete pavers. While they offer a unique look, they might not be the best choice for high-traffic areas like patios. On the other hand, brick and concrete pavers are more affordable and versatile, making them a popular choice for many homeowners.
That additional costs may arise from site preparation, such as removing old materials or addressing drainage issues. For a more accurate estimate, consider consulting with a professional like SalCorp Landscaping & Construction.
Can I install a paver patio over an existing concrete patio?
Yes, you can install a paver patio over an existing concrete patio, but there are some important steps to follow. First, ensure the concrete is in good condition—no major cracks or uneven areas. If the concrete is damaged, it’s best to repair it before proceeding.
To install pavers over concrete, you’ll need to:
- Clean the Surface: Remove any debris, dirt, or moss.
- Add a Bonding Layer: Apply a bonding agent to help the pavers adhere to the concrete.
- Lay a Sand Base: Spread a thin layer of sand over the concrete to provide a level surface.
- Place the Pavers: Lay the pavers in your desired pattern, ensuring they are level.
- Fill Joints: Sweep sand into the joints between the pavers to lock them in place.
This method can save time and effort compared to removing the concrete, but it’s crucial to ensure proper drainage to avoid water pooling.
How do I choose the right pavers for my patio?
Choosing the right pavers for your patio involves several considerations:
- Style and Aesthetics: Look for pavers that complement your home’s design. Pavers come in various shapes, sizes, and colors, so you can create a unique look that fits your taste. For inspiration, check out the SalCorp Landscaping gallery.
- Functionality: Consider how you’ll use the space. If your patio will see heavy foot traffic or support outdoor furniture, choose durable materials like concrete or brick pavers. For decorative areas, you might opt for more intricate designs with natural stone.
- Maintenance Requirements: Different pavers have different upkeep needs. For instance, some pavers may require sealing, while others might need regular cleaning. Think about how much time you’re willing to invest in maintenance.
- Cost: Your budget will play a significant role in your choice. Higher-quality materials might have a higher upfront cost but can offer better durability and lower maintenance costs over time.
By considering these factors, you can select pavers that not only enhance your outdoor space but also meet your practical needs. For expert advice, contact SalCorp Landscaping & Construction to schedule a consultation.
Next, we’ll explore the differences between DIY installation and hiring professionals, helping you decide the best approach for your project.
Conclusion
Creating a paver patio is a rewarding project that can transform your outdoor space into a beautiful and functional area. Whether you’re looking to relax, entertain guests, or simply enjoy your garden, a well-installed paver patio can enhance your lifestyle and increase your home’s value.
Project Satisfaction
One of the greatest rewards of installing a paver patio is the sense of accomplishment you’ll feel once the project is complete. Seeing your vision come to life, knowing the effort and planning that went into it, can be incredibly satisfying. Plus, you’ll have a durable, low-maintenance outdoor area that you can enjoy for years to come.
Enhancing Your Outdoor Space
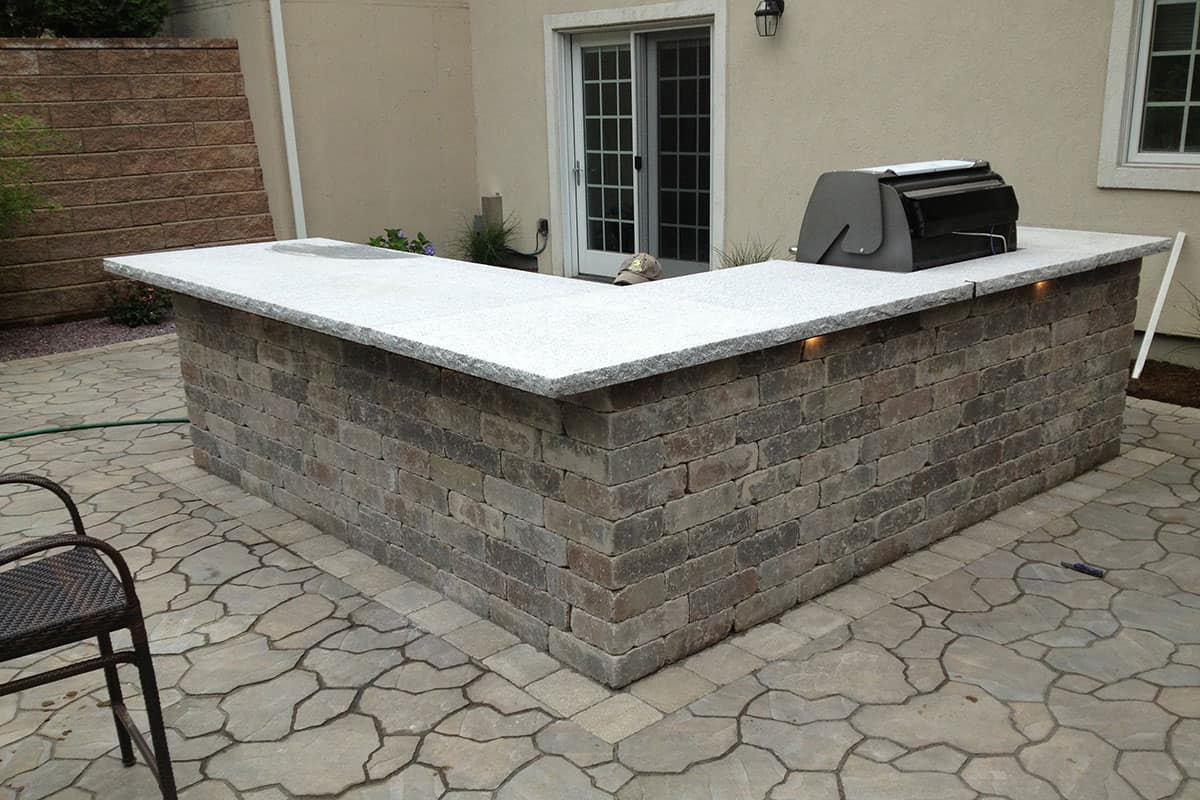
A paver patio offers endless design possibilities. From choosing the paver material and color to deciding on the layout and additional features like sitting walls or fire pits, you can create a customized space that fits your style and needs. The right paver patio can seamlessly blend with your home’s architecture, making your outdoor space an extension of your indoor living area.
SalCorp Landscaping & Construction
At SalCorp Landscaping & Construction, we specialize in creating stunning paver patios that are both functional and aesthetically pleasing. Our team of experts will guide you through the entire process, from selecting the right materials to the final touches. We pride ourselves on delivering high-quality work that meets and exceeds our clients’ expectations.
Ready to transform your outdoor space? Contact SalCorp Landscaping & Construction today to start planning your dream paver patio. Let’s create a space you’ll love and enjoy for years to come.
