

How to build a retaining wall on a slope: 1st Easy
Why Building a Retaining Wall on a Slope is a Game-Changer for Your Property
Learning how to build a retaining wall on a slope turns a steep, erosion-prone hillside into a stable, useful part of your yard. The project is heavy work, but the payoff is a safer landscape, more flat space, and higher curb appeal.
Quick Overview:
- Plan & design the wall and drainage
- Excavate a stepped trench
- Install 6 in.+ compacted gravel base
- Lay and level the first course with drainpipe
- Stack, backfill, and reinforce as needed
- Cap, grade, and enjoy the new space
Retaining walls fight gravity and wet soil. Done right, they can last for decades; done wrong, they can fail in just a few seasons. Proper drainage and a solid base are non-negotiable.
For more detail, see our guides on what is a retaining wall and retaining wall design.
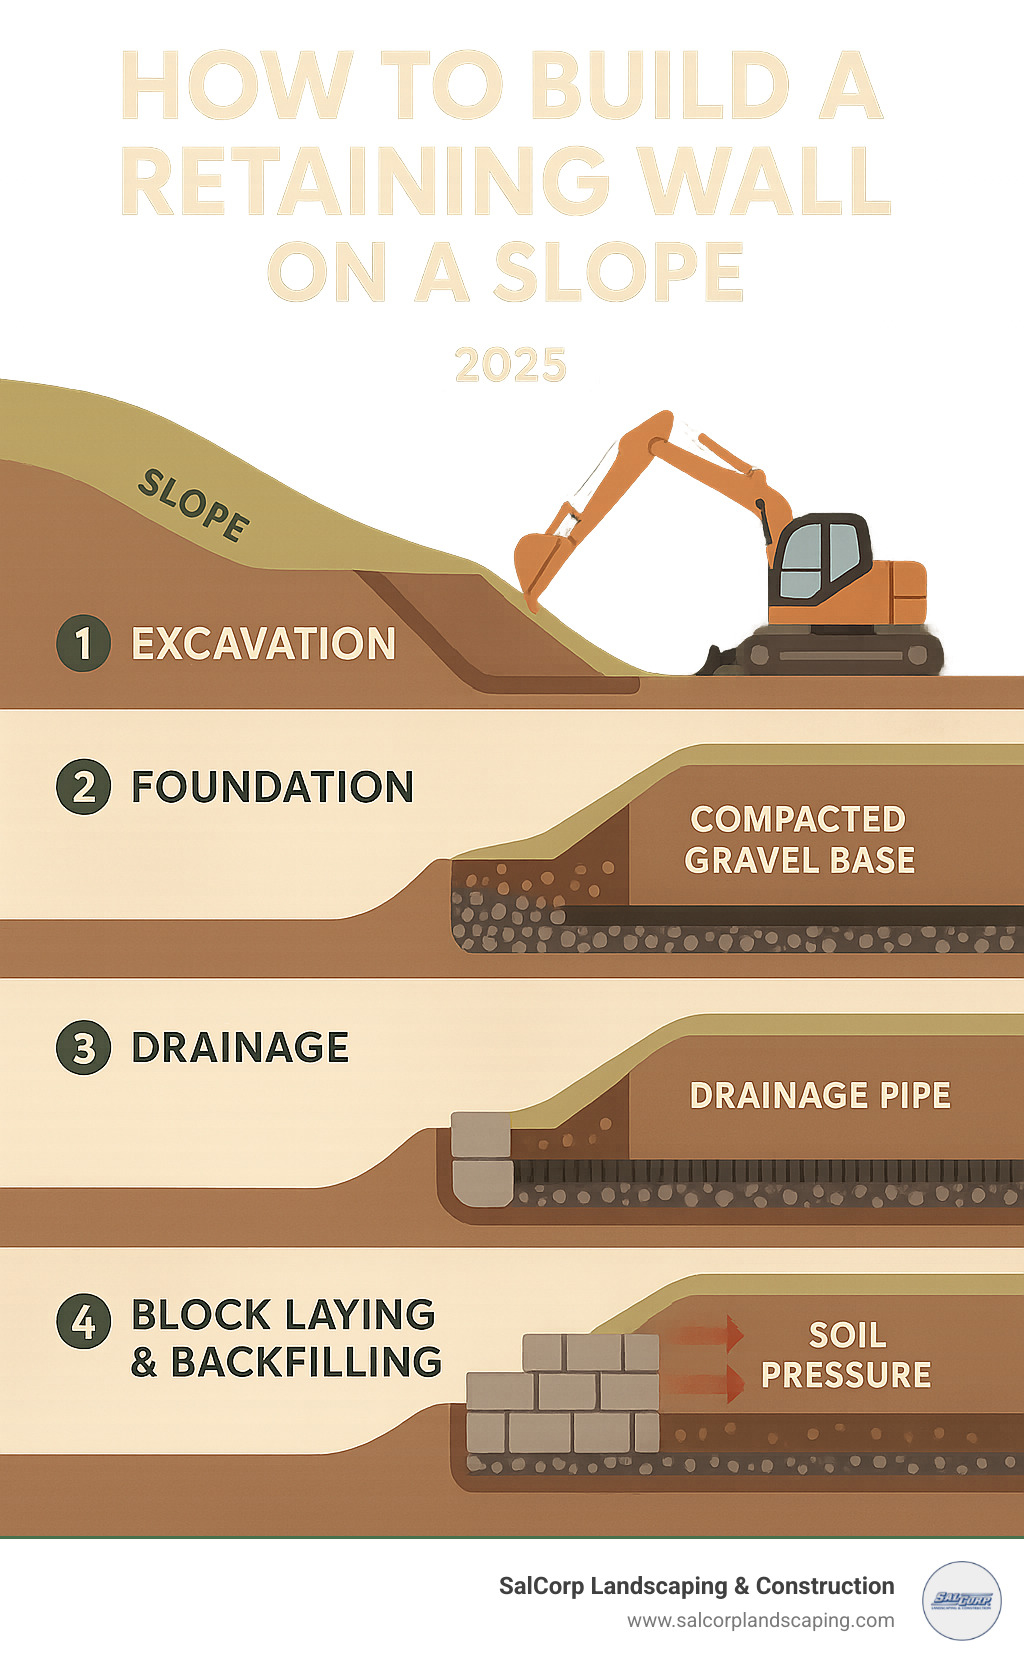
Planning and Designing Your Wall for a Slope
Good design prevents 90 % of retaining-wall problems. Walk the site, note water flow, tree roots, utilities, and the slope angle. Slopes steeper than 26° (≈2:1) or clay soils often call for professional help.
Check local permits (many MA towns require them over 4 ft) and design drainage before digging. Poor drainage is the #1 cause of failure.
Key Design Factors
- Wall height (include buried base)
- Extra loads (driveways, patios)
- Soil type & frost depth: In Massachusetts, soils can be rocky or clay-heavy, which affects drainage and stability. The frost line can be deep, requiring the wall’s base to be buried sufficiently to prevent frost heave from pushing the wall up and out of alignment over winter.
- Drainage outlet location
Choosing Materials (average internet cost per face ft*)
| Material | Pros | Cons | DIY? | Cost |
|---|---|---|---|---|
| Interlocking blocks | Strong, no mortar | Heavier cost | Yes | $15–$50 |
| Pressure-treated timber | Inexpensive, light | Shorter life | Yes | $10–$30 |
| Poured concrete | Custom shapes, durable | Forms, skill | Rarely | $30–$100 |
| Natural stone | Aesthetic | Heavy, pricey | Some | $25–$100 |
*Average pricing only; not SalCorp quotes.
DIY or Hire?
DIY is fine under 4 ft and with good soil. Call an engineer if you exceed 4 ft, have clay soil, a steep slope, or the wall supports a structure. Our Masonry and Concrete Contractors Near Me page outlines professional options.
Essential Tools and Materials Checklist
Have everything on-site before you start. Rent specialty gear like a plate compactor rather than buy.
Core Tools
- Shovels (spade & flat)
- Wheelbarrow
- Plate compactor or hand tamper
- Torpedo & 4-ft levels
- Rubber mallet
- Drill (for timber projects)
- Stakes, mason line, tape measure
- Safety gear: gloves, glasses, steel-toe boots
Optional rentals: post-hole auger, block splitter.
Materials
- 6 in.+ of 3/4-in. crushed gravel for base
- Leveling sand (small amount)
- Retaining wall blocks or timbers
- 4-in. perforated drainpipe + outlet pipe
- Geotextile fabric
- Clean drainage gravel (8–12 in. behind wall)
- Construction adhesive for capstones
Order 10–15 % extra blocks and gravel to avoid mid-project shortages.
How to Build a Retaining Wall on a Slope: Step-by-Step

1. Excavation & Base Prep
Call 811, mark the wall with stakes and string (a hose for curves), then dig a stepped trench twice the block depth and deep enough for 6 in. of gravel plus the buried course. Compact the trench bottom.
Add crushed gravel in 2–3 in. lifts, compacting each lift. Finished base: level, 6 in.+ thick, and as solid as concrete.
2. First Course & Drainage
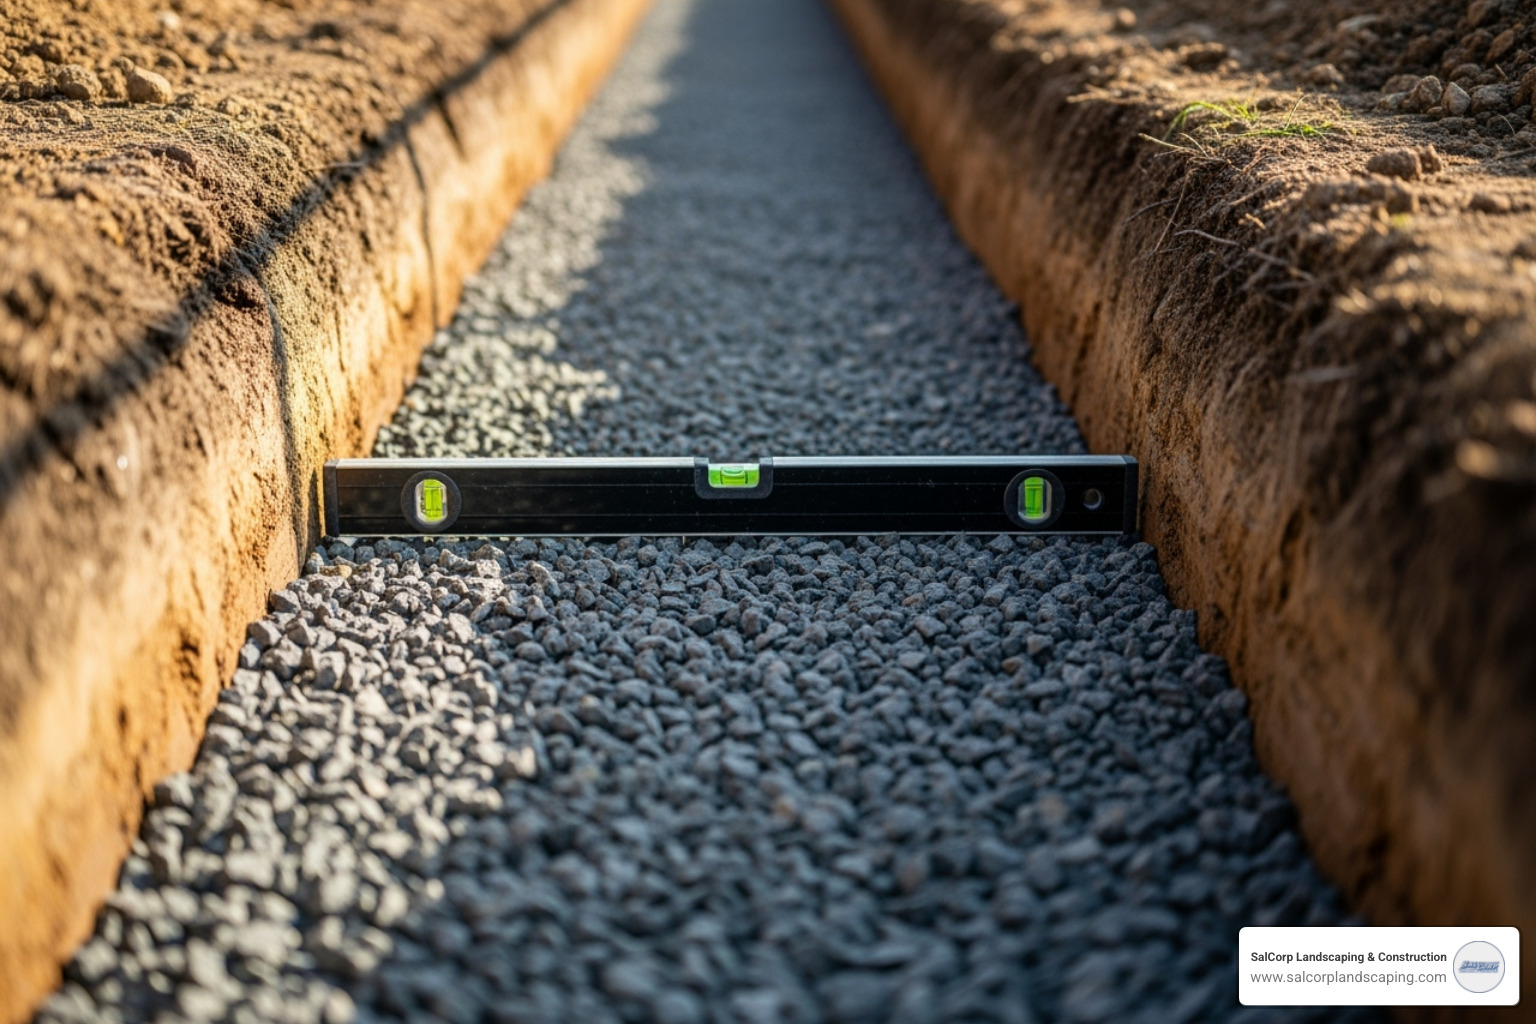
Place and level each base block; remove any rear lip if required. Lay 4-in. perforated pipe behind the first course, sloped 1 in. per 4 ft, wrapped in fabric and surrounded by gravel.
3. Stack, Reinforce, Backfill
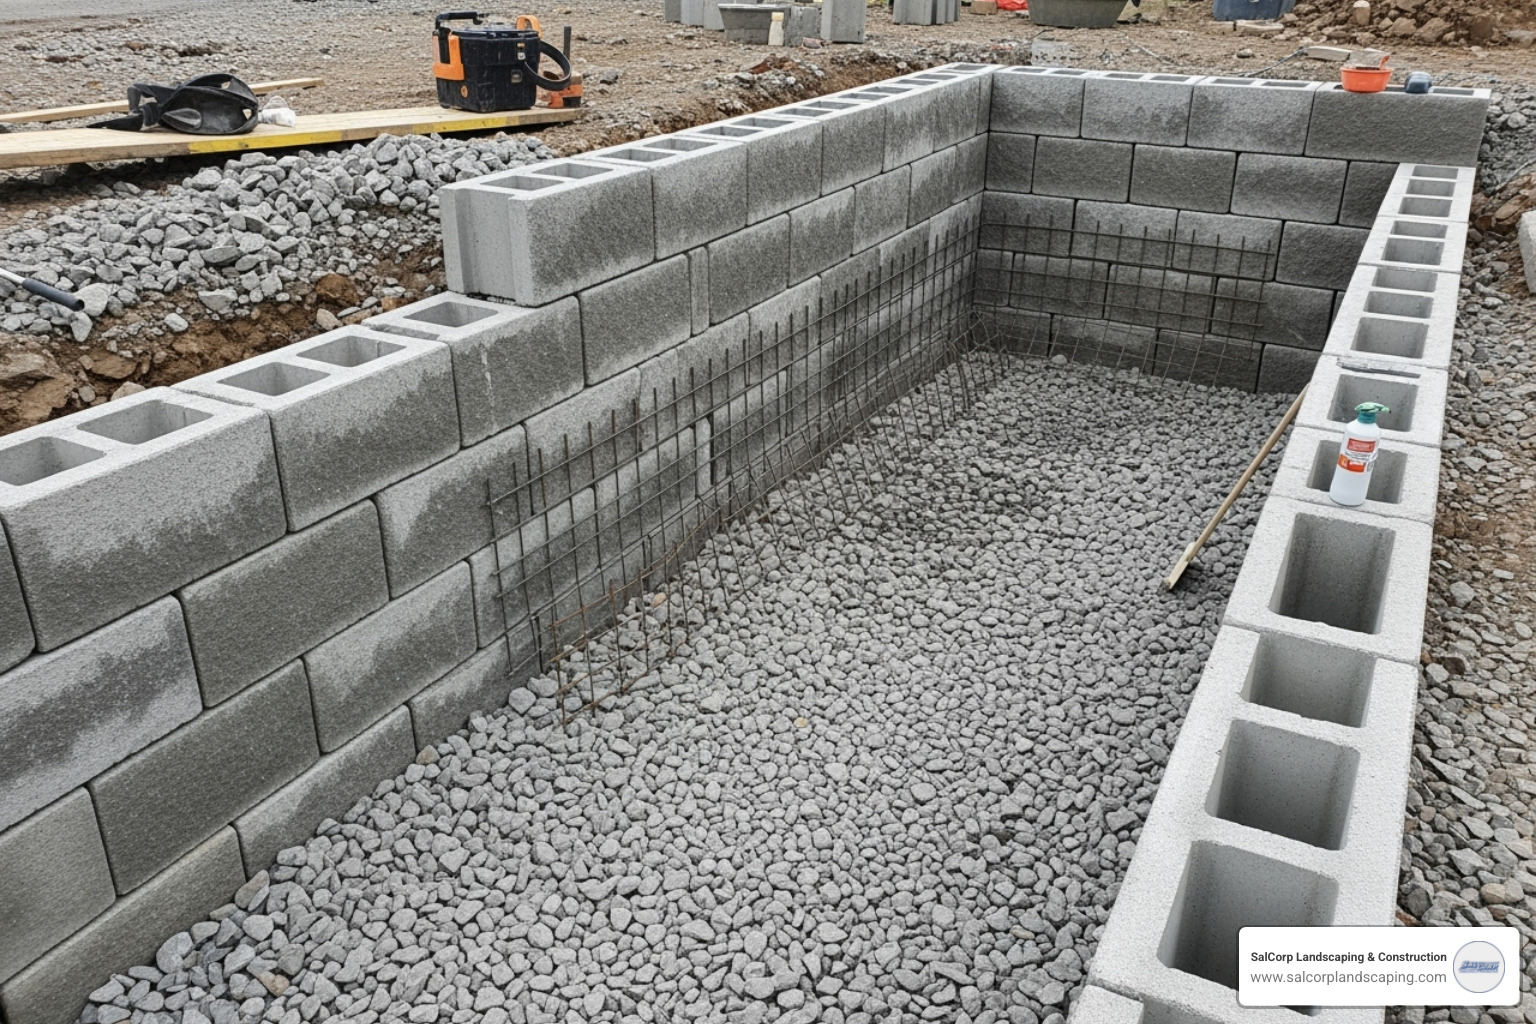
Stagger joints, sweep each course clean, and lean the wall about 1 in. per foot into the hill (most block systems build this in). Backfill with clean gravel every course, compacting in 4-in. lifts. Add geogrid every 2–3 courses for walls over 3 ft.
4. Cap & Final Grade
Apply construction adhesive, set capstones, then backfill the top 6 in. with quality soil graded away from the wall. Seed or plant to reduce surface erosion.
Ensuring Longevity: Maintenance & Troubleshooting
Inspect the wall each spring: look for bulges, cracks, or clogged drain outlets. Clear debris, top up eroded soil, and reseal small cracks with masonry caulk.
Common fixes:
- Bulge/lean -> This is often caused by hydrostatic pressure from poor drainage. If the lean is significant, the only safe fix is to rebuild the affected section with proper drainage.
- Cracks -> Seal hairline cracks to prevent water intrusion. If cracks are widening or stair-stepping through blocks, it indicates a structural problem that requires rebuilding.
- Clogged outlet -> Flush the pipe with a hose, and consider adding a grate to the outlet to keep debris and animals out.
- White stains (efflorescence) -> This powdery deposit is usually harmless salt leaching from the concrete. It can often be removed with a stiff brush and specialized cleaner, but it may indicate excess moisture behind the wall.
Safety Recap
Wear PPE, lift with your legs, never enter an unsupported trench deeper than 4 ft, and keep guards on power tools. A safe crew builds a better wall.
Frequently Asked Questions
How high can I build without an engineer?
Most MA towns allow DIY walls up to 4 ft total height (visible + buried). Any wall supporting a driveway, patio, or steep slope should be engineered, even if shorter.
What step is most critical?
A level, compacted gravel base plus working drainage. Get these right and the wall will likely thrive; skip them and failure is almost guaranteed.
What will it cost?
Internet averages run $15–$100+ per square face foot depending on material, height, and site complexity. Timber is usually lowest; custom stone or poured concrete the highest. These numbers are not SalCorp quotes—ask us for a project-specific estimate.
Transform Your Sloped Yard with Confidence
Building a retaining wall is a rewarding but labor-intensive project that can dramatically improve your property’s usability and aesthetics. By following these steps for proper planning, base preparation, and drainage, you can build a structure that is both beautiful and durable.
The key to success in how to build a retaining wall on a slope lies in understanding that these structures are complex engineered systems battling gravity and restraining tons of saturated soil. Think about it – a typical 4-foot-high, 15-foot-long wall holds back as much as 20 tons of saturated soil. That’s like holding back four full-sized pickup trucks worth of weight!
This tremendous force is why every detail matters, from the compacted gravel base to the drainage system to the proper backfill techniques. Poor drainage remains the main cause of wall failure, making proper water management absolutely essential. When you see a failed retaining wall, nine times out of ten it’s because water found a way to build up behind it.
The good news is that when you follow proper techniques and take your time, you can build a wall that will last for decades. Don’t rush the process – this isn’t a weekend project for most people. Plan on at least a week for a typical residential wall, and remember that the physical demands are significant. You’ll be moving tons of materials by hand, so pace yourself and don’t hesitate to recruit help.
If the project seems too complex or you’re dealing with a particularly challenging slope in the Walpole, MA area, consider professional help. SalCorp Landscaping & Construction has over 20 years of owner-operated experience and the right machinery to tackle any hardscaping challenge, ensuring your project is done right the first time.
We serve communities throughout Massachusetts, including Walpole, Newton, Wellesley, Needham, and dozens of other towns. Our team understands the unique challenges of New England soils, frost conditions, and local building requirements. We’ve seen what works and what doesn’t in our climate, and we know how to build walls that stand the test of time.
Whether you choose to tackle this project yourself or work with professionals, the investment in a properly built retaining wall will pay dividends for years to come. You’ll gain increased property value, improved functionality, and improved curb appeal that makes your outdoor space more enjoyable for your family and more attractive to potential buyers.
Take your time, follow proper techniques, and don’t hesitate to seek help when needed. Your future self will thank you for building it right the first time – and your neighbors will be impressed with your handiwork for years to come.
