Installing Landscape Edging: 7 Powerful Tips for Easy Success 2025
Why Proper Landscape Edging Installation Transforms Your Property
Installing landscape edging creates clean, defined borders that separate your lawn from garden beds, walkways, and other landscape features. Here’s what you need to know:
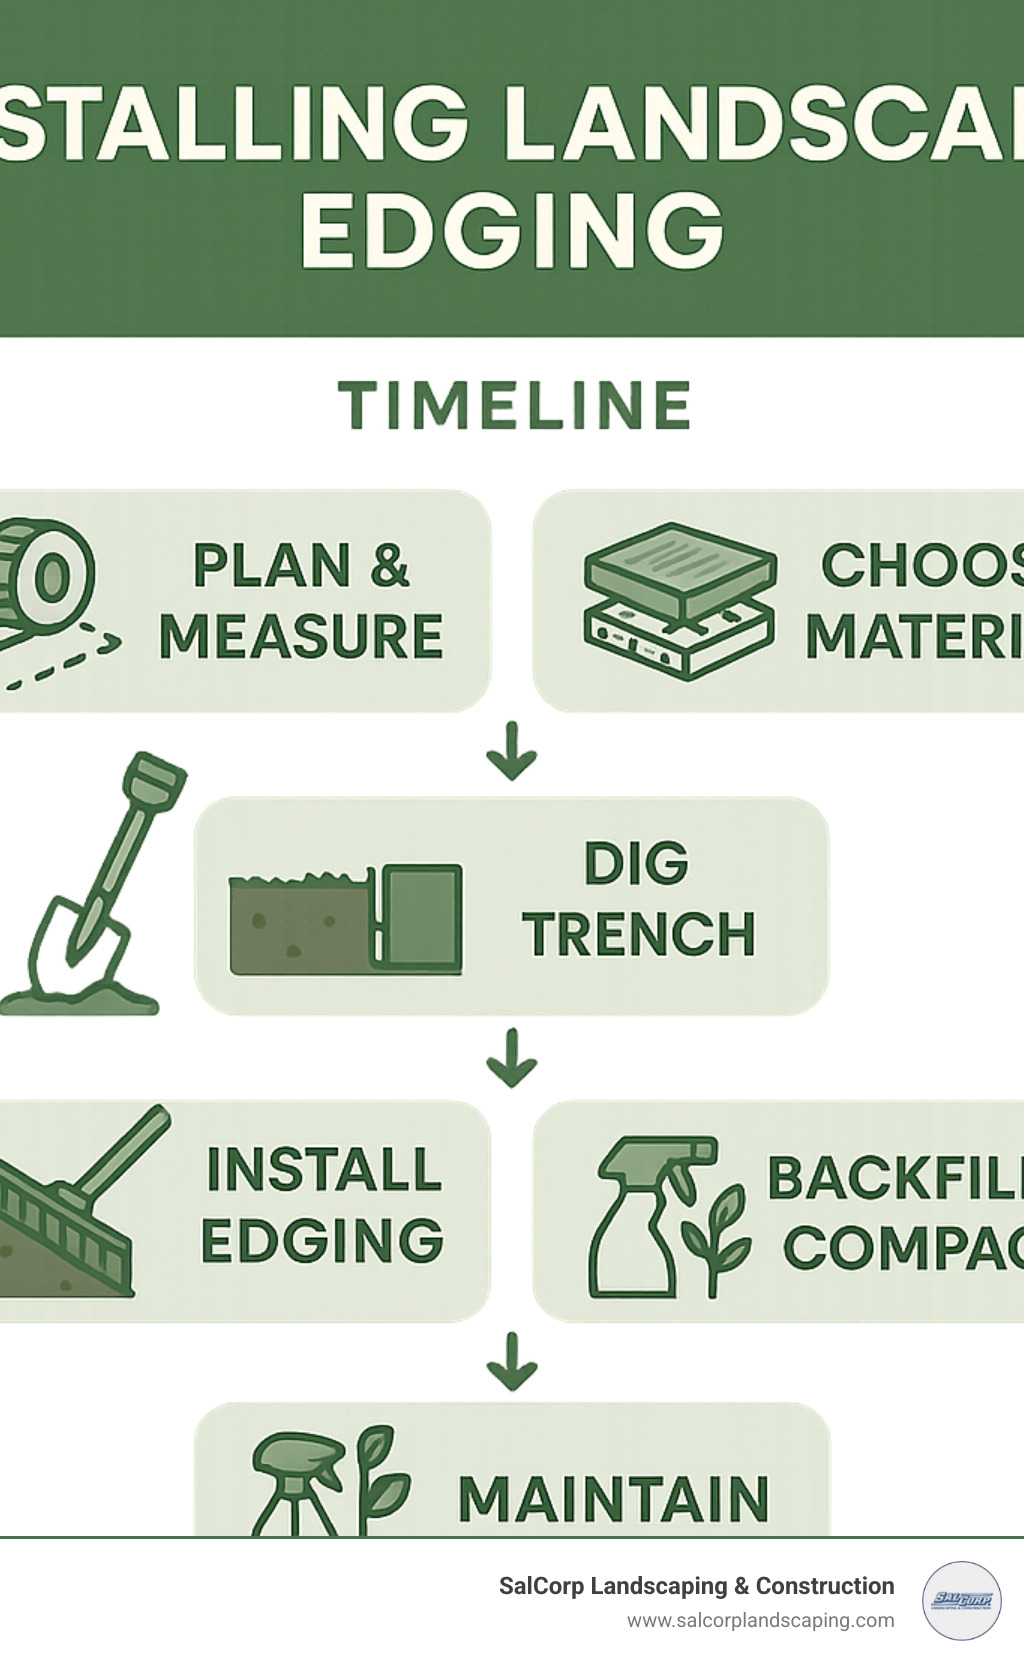
Quick Installation Overview:
1. Plan & measure your borders (add 10% extra material)
2. Choose your material – plastic ($0.50-$3/ft), metal ($2.50-$6.50/ft), or stone ($5-$15/ft)
3. Mark the layout with spray paint or garden hose
4. Dig a trench 3-6 inches deep, 4-6 inches wide
5. Install edging with proper orientation and staking
6. Backfill and compact soil around edges
7. Water thoroughly to settle everything in place
Installing landscape edging isn’t just about looks—it’s about function. Professional landscapers report that properly installed edging can reduce lawn maintenance time by up to 30% by preventing grass from creeping into flower beds. It also keeps mulch where it belongs, creates crisp lines that boost curb appeal, and can increase your property’s perceived value by up to 10%.
The change goes beyond mere aesthetics. Quality edging installation creates a maintenance barrier that saves homeowners hours of tedious hand-trimming around garden beds. Without proper borders, grass roots spread aggressively into mulched areas, creating an ongoing battle that many homeowners eventually lose. Professional-grade edging stops this invasion at the source, creating a root barrier that maintains clean separation for decades.
Property value improvement comes from multiple factors. Real estate professionals consistently note that well-defined landscape borders create an impression of professional maintenance and attention to detail. This perceived care extends to potential buyers’ assumptions about overall property maintenance, often translating to higher offers and faster sales.
The key to success? Proper depth and staking. Research shows that commercial-grade installations can last 20-25 years when done right, compared to just 3-7 years for poorly installed cheap edging that falls victim to frost heave and mower damage. The difference lies in understanding soil conditions, climate factors, and installation techniques that work with natural forces rather than against them.
I’m Sal Musto, owner of SalCorp Landscaping & Construction, and over the past two decades I’ve overseen countless installing landscape edging projects across Massachusetts. My hands-on approach means I’ve seen every mistake in the book—and learned the tricks that ensure your edging stays put for decades. From the sandy soils of Cape Cod to the clay-heavy grounds around Boston, each installation teaches us something new about working with local conditions.
Our experience spans everything from simple residential flower bed borders to complex commercial installations involving thousands of linear feet. We’ve learned that climate-specific techniques make the difference between success and frustration. Massachusetts presents unique challenges with its extreme temperature swings, heavy snow loads, and aggressive freeze-thaw cycles that can destroy improperly installed edging in a single season.
Installing landscape edging helpful reading:
– lawn installation services
– lawn service mulch installation
– sodding landscaping
What You’ll Learn
This comprehensive guide covers everything from material selection and cost planning to professional installation techniques and long-term maintenance. We’ll walk you through the benefits of different edging materials, provide step-by-step installation instructions for plastic, metal, and stone options, and share pro tips that prevent common failures like frost heave and warping.
You’ll also learn cost-effective strategies for planning your project, including how to calculate materials accurately and design layouts that work with your landscape’s natural contours. Whether you’re a DIY enthusiast or considering professional installation, this guide gives you the knowledge to make informed decisions.
The technical aspects we’ll cover include soil preparation techniques specific to New England conditions, proper drainage considerations that prevent water damage, and seasonal timing strategies that maximize installation success. We’ll also explore how different edging materials perform in various applications, from high-traffic areas to decorative garden borders.
Regional considerations play a crucial role in material selection and installation techniques. What works beautifully in warmer climates may fail spectacularly in Massachusetts winters. We’ll share insights gained from decades of local experience, including which materials handle salt exposure from winter road treatments and how to design installations that complement New England’s natural landscape aesthetic.
Why Landscape Edging Matters & How to Choose the Right Material
Think of installing landscape edging as drawing a boundary line that keeps grass, mulch, and decorative stone exactly where you want them. Clean borders boost curb appeal, speed up mowing, and protect plants from stray mower wheels. In Massachusetts, that border also has to survive punishing freeze–thaw cycles, salty coastal air, and heavy foot-traffic.
Below is a streamlined look at the three materials most homeowners consider. Pick the one that meets your budget, skill level, and longevity needs.
| Material | Avg. Cost* | Expected Lifespan | Best For | Watch-Outs |
|---|---|---|---|---|
| Plastic | $0.50–$3 / ft | 3–7 yrs | Budget DIY, flowing curves | UV fade, frost heave if shallow |
| Metal | $2.50–$6.50 / ft | 20–25 yrs | Straight runs, modern look | Higher upfront cost, limited tight curves |
| Stone / Brick | $5–$15 / ft | 25 + yrs | Premium, permanent installations | Heavy, more labor |
*Average internet ranges, not SalCorp pricing.
Quick material notes:
• Plastic bends easily for organic shapes and is light enough for one-person installs. Modern UV-stabilized versions last longer, but depth and staking still make or break success.
• Metal (steel or aluminum) delivers razor-straight lines that stay put for decades. Steel will patina; aluminum keeps a clean finish. Neither material minds salt or snow when installed below frost depth.
• Stone or brick blur the line between edging and hardscape. They pair naturally with patios or walkways and can raise property value, but you’ll move real weight and need a perfectly level base.
Need layout inspiration before you buy? Browse Creative Ideas for Garden Borders and Edging or test designs with free landscape software.
Planning Your Project: Measurements, Layout & Cost Calculations
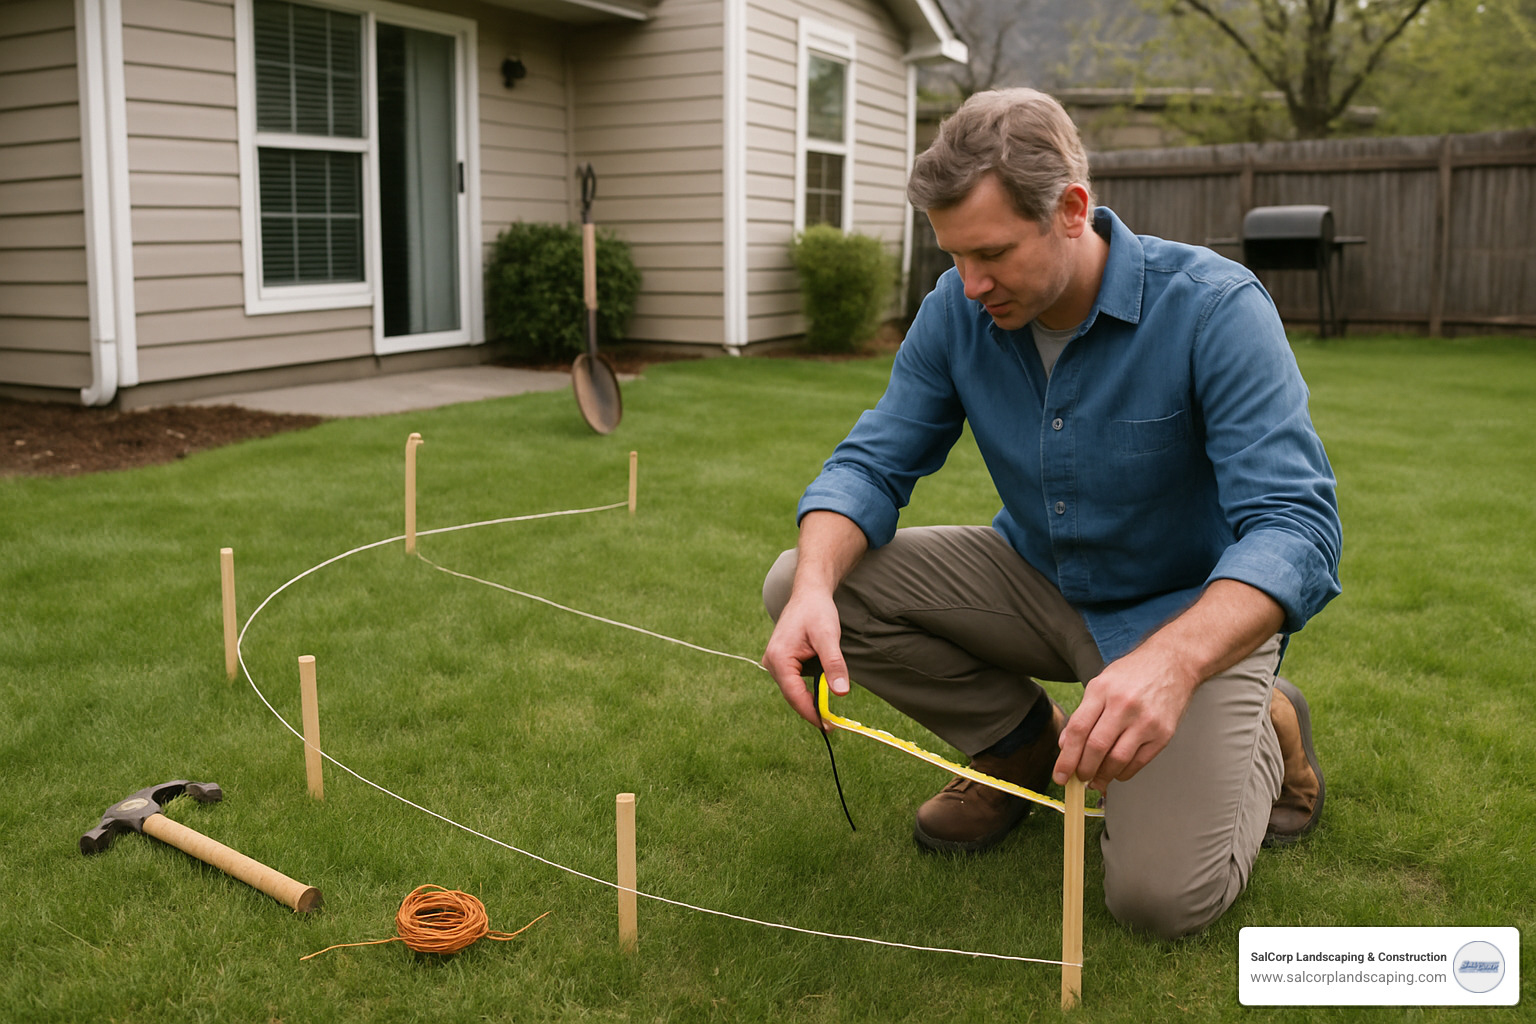
A winning border starts on paper. Walk the yard, sketch ideas, and decide the real job of every edge—weed control, pathway definition, or pure aesthetics. Once the purpose is clear, follow three planning steps:
- Rough in the shape. Lay a garden hose for curves or pull a mason line for straight runs. Adjust until the view from patios, windows, and the street looks balanced.
- Measure twice, order once. Record total linear footage and add 10 % for cuts and mistakes.
- Call 811. Free utility marking beats expensive repairs—and keeps everyone safe.
Budget snapshot (average internet data; not SalCorp rates): simple DIY plastic edges can slide in under $1 / ft, while contractor-installed natural stone can break $45 / ft. Site access, soils, and curves swing totals dramatically.
Estimating Materials
• Plastic: one steel stake every 2–3 ft plus connectors at every joint.
• Metal: factory holes every ±18 in; use galvanized stakes and a rubber mallet.
• Stone/Brick: 1 in of leveling sand and optional polymeric sand for joints.
Pro move—stage a tarp for excavated soil. You’ll either reuse it for backfill or haul it away, but it won’t smother your lawn in the meantime.
Laying Out Lines & Corners
For perfect right angles, use the 3-4-5 rule (any multiple works: 6-8-10, 9-12-15). On curves, keep radii gentle; abrupt bends look forced and invite shifting. Final-check everything with that garden hose before the shovel hits dirt.
Need a full master plan? Our Landscape Design Services turn ideas into scale drawings that account for grades, drainage, and plant growth.
Step-by-Step Guide to Installing Landscape Edging
Regardless of material, a lasting edge follows the same core recipe.
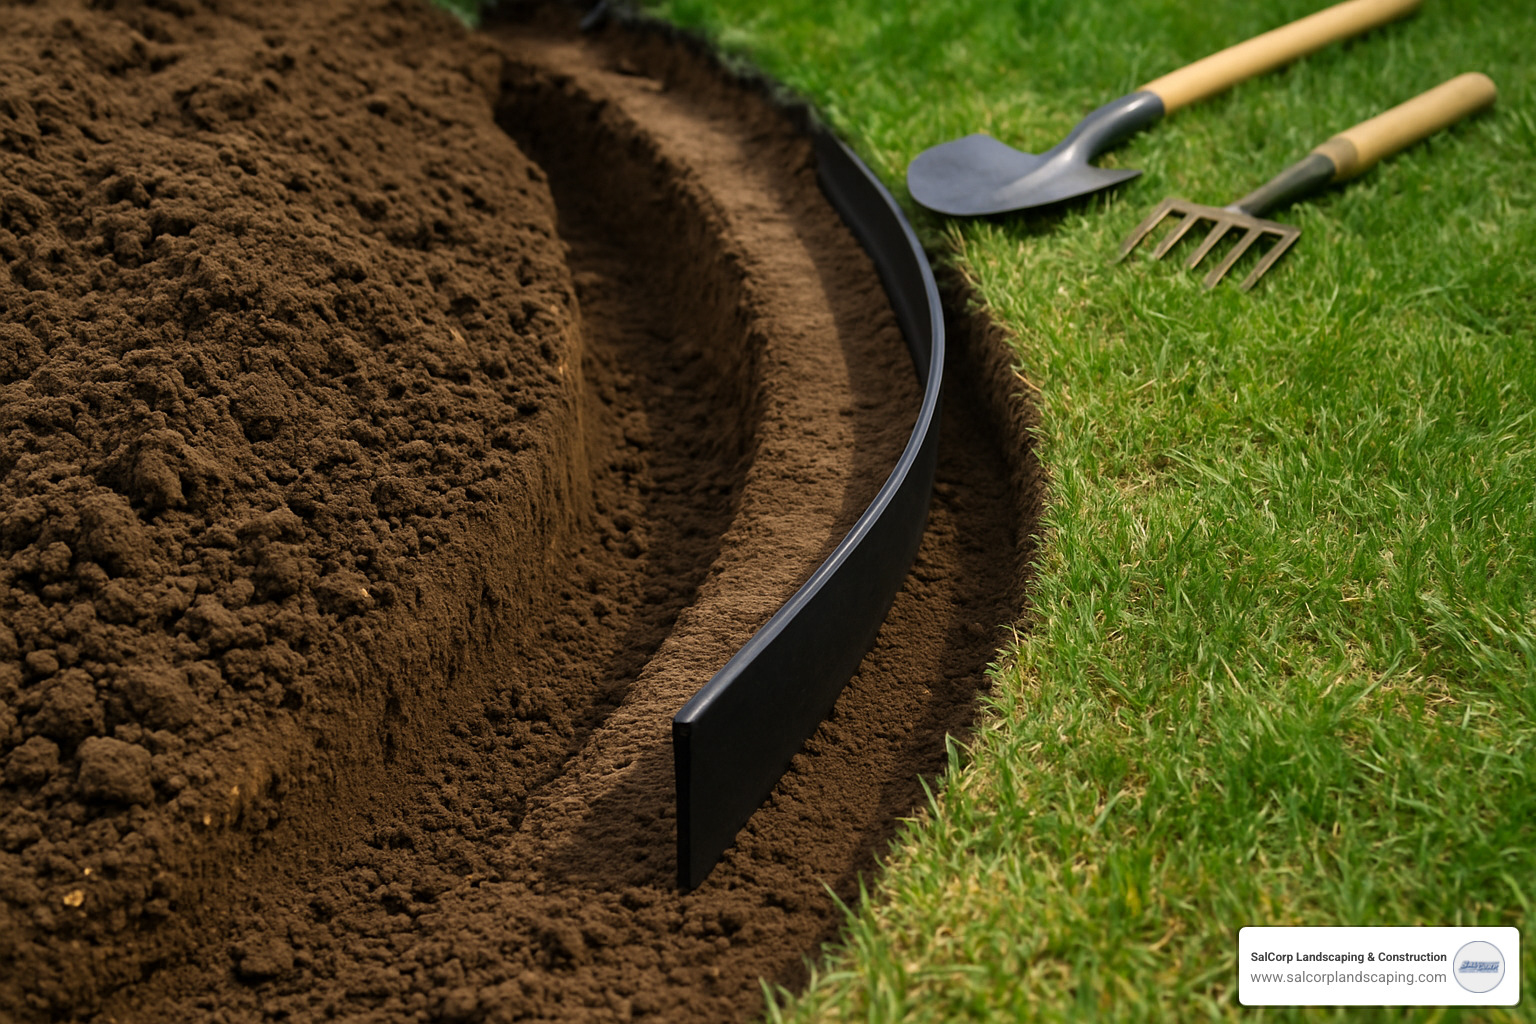
1. Dig the Trench
• Width: 4–6 in
• Depth: 3–6 in (bury at least 50 % of the edging height)
• Slope slightly away from beds so water drains, not pools.
Remove rocks and roots, and add a 1 in sand cushion for stone or brick.
2. Set the Edging
Plastic
1. Uncoil in sun so it relaxes.
2. Insert 8 in connectors halfway into each piece.
3. Drop into trench with the V-flange facing the garden bed.
4. Drive steel stakes every 2–3 ft at a shallow (≈25°) angle.
Metal
1. Place sections; pound gently with a rubber mallet or seat in trench.
2. Secure with galvanized stakes through factory slots (about every 18 in).
3. Overlap or use supplied couplers per manufacturer directions.
Stone / Brick
1. Screed the sand base dead level.
2. Set stones in a soldier (vertical) or flat course, staggering joints.
3. Tap flush with a mallet and level. Fill joints with sand or mortar for high-traffic spots.
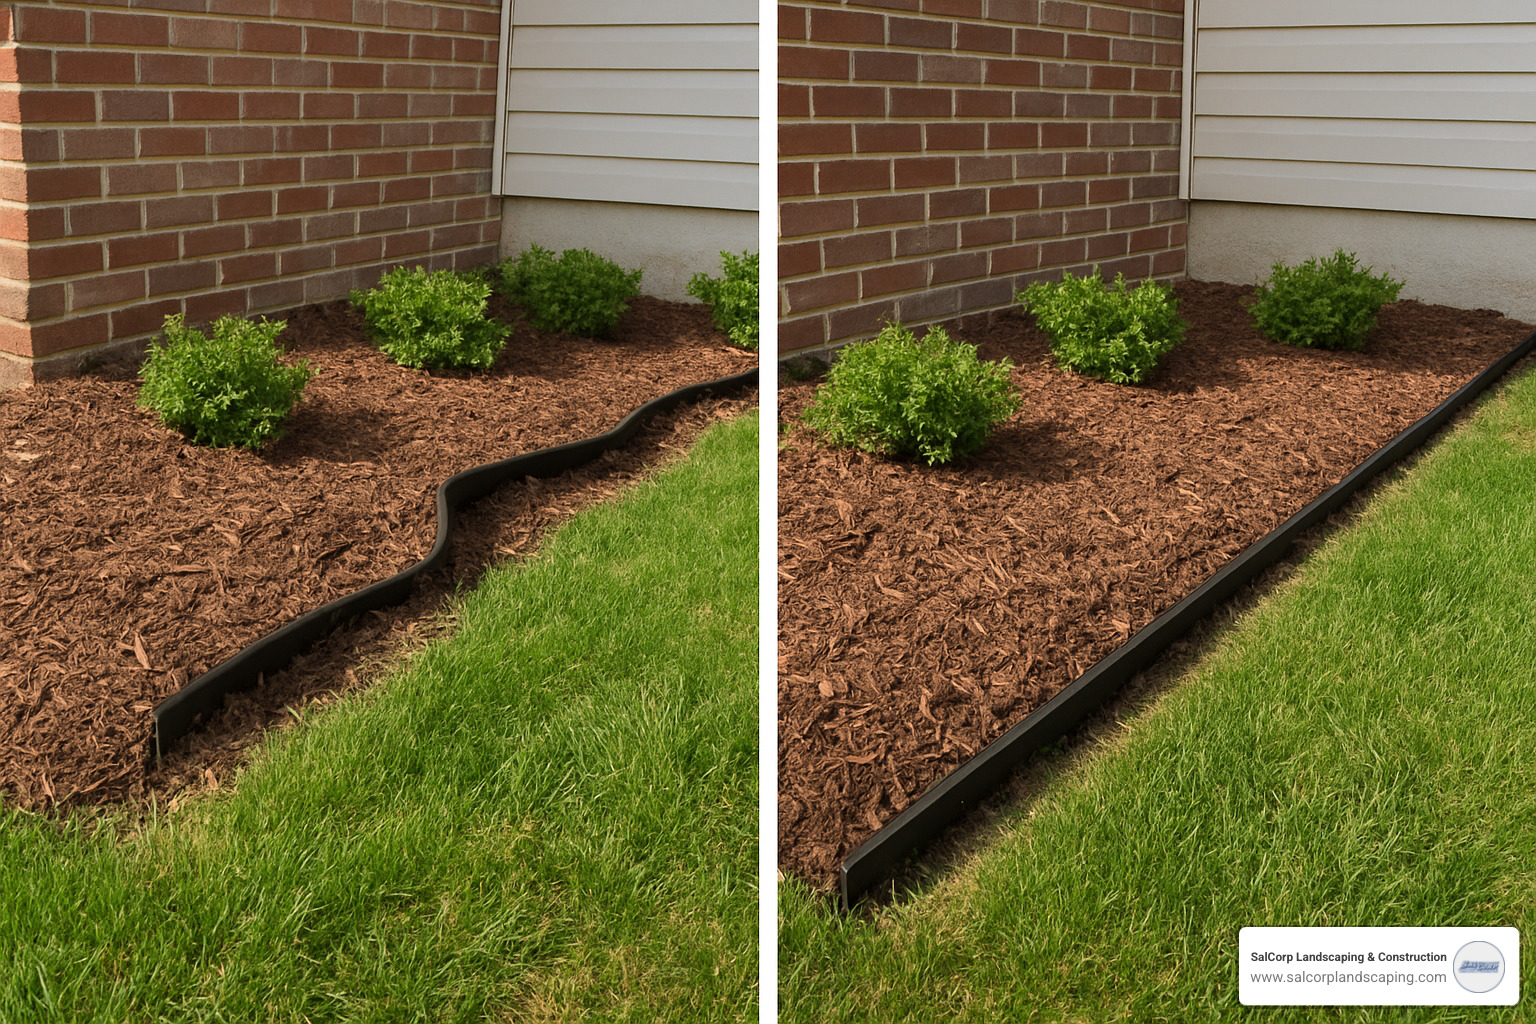
3. Backfill & Finish
Pack soil firmly against both sides, paying extra attention to the outside of curves. Water well to settle, add more soil if needed, and leave only ½ in showing above grade for that crisp look. Tie everything together with fresh mulch—or schedule comprehensive Hardscaping Services if the edging is part of a larger makeover.
Pro Tips, Common Mistakes & Maintenance Hacks
Field-Tested Tricks
• Extra stakes rule New England. We add one at every joint and curve—cheap insurance against frost heave.
• Flat-angle stakes. Drive no steeper than 25°; horizontal anchors resist lifting forces.
• Joint placement matters. Keep connections in the middle of straight runs, never on corners.
• Sun-soften plastic. An hour in direct sun removes coil memory and prevents wavy lines.
Slip-Ups to Avoid
- Shallow trenches—bury at least half the edging height.
- Too few stakes—especially in clay or on slopes.
- V-flange backwards—it should face the planting bed, not the turf.
- Skipping soil compaction—air pockets equal movement.
Easy Annual Care
Spring walk-throughs take minutes: push mulch back to ½ in below the top, replace missing stakes, and press down any spots that rose over winter. If a section lifts, pull the stakes, deepen the trench, and reinstall correctly—it will rarely misbehave twice.
Handle edges with a string trimmer, not the mower deck, to protect both the mower blades and your new border.
Frequently Asked Questions about Installing Landscape Edging
How deep should edging be for best results?
The magic number for installing landscape edging is 6 inches deep—this gives you the stability and frost resistance you need in Massachusetts. You want at least half of your edging material buried underground, which means for standard 4-inch plastic edging, about 2-3 inches should show above ground.
Here’s why depth matters so much: shallow installations are sitting ducks for our brutal freeze-thaw cycles. When water freezes in the soil around poorly installed edging, it acts like a hydraulic jack, literally pushing your carefully installed borders right out of the ground.
For stone or brick edging, aim for 2-3 inches below grade minimum. These heavier materials don’t need to be buried as deeply, but they still need that solid foundation to prevent shifting during spring thaw.
I’ve seen properly installed edging from the 1970s still holding strong today—that’s the power of doing it right the first time. The extra hour you spend digging deeper pays dividends for decades.
What’s the easiest material for DIY beginners?
Plastic edging is your best friend if you’re new to this game. It’s lightweight enough that you won’t throw out your back, flexible enough to forgive small mistakes, and affordable enough that you can practice without breaking the bank.
The real beauty of plastic edging is how forgiving it is. Made a cut in the wrong spot? No problem—grab a connector and keep going. Need to adjust a curve? Just pull up a few stakes and reshape it.
Start with a small, straight section first—maybe along a walkway or simple flower bed. This lets you master the trenching, staking, and backfilling techniques without tackling the trickier curves right away. Once you’ve got the basics down, those skills transfer beautifully if you decide to upgrade to metal or stone later.
No-dig plastic systems are even more beginner-friendly, though they won’t give you the same longevity as a properly trenched installation. Think of them as training wheels—great for learning, but you’ll probably want to upgrade eventually.
How do I handle curves or steep slopes?
Curves are where plastic edging really shines—it bends naturally into smooth, flowing lines that look professionally designed. Use a garden hose to lay out your curves before you start digging. This lets you walk around and view the shape from different angles, adjusting until it looks just right.
The secret to beautiful curves is thinking like water—gentle, flowing lines always look more natural than sharp bends. If you’re trying to force a tight curve, consider using multiple shorter pieces of edging rather than wrestling one long piece into submission.
Steep slopes present their own challenges, and honestly, sometimes the best answer is “don’t.” Instead of trying to edge straight across a steep slope, consider terracing with retaining walls or following the natural contour lines.
If you must edge on a slope, drainage becomes critical. Make sure your edging slopes slightly toward the lower end so water doesn’t pool behind it. You’ll also need extra stakes—gravity and water runoff will test your installation harder than flat ground ever will.
For slopes steeper than about 15 degrees, it’s worth having a conversation with professionals about whether edging is the right solution or if you need a more robust approach.
Conclusion & Next Steps
Installing landscape edging creates those crisp, professional borders that make your neighbors stop and take notice. More importantly, it saves you countless hours of maintenance while protecting your garden investments from wandering grass and scattered mulch.
The difference between edging that lasts decades and edging that disappoints comes down to three things: proper planning, quality materials, and attention to installation details. That means digging deep enough, staking at the right angle, and not rushing through the backfilling process.
At SalCorp Landscaping & Construction, we’ve been perfecting edging installations across Massachusetts for over 20 years. As an owner-operated business, I personally oversee projects from Walpole to the Cape, and I’ve learned that the details matter. Whether it’s choosing the right material for your climate or understanding how Massachusetts frost cycles affect different installation techniques, experience makes all the difference.
You might decide to tackle this project yourself—and with the right preparation, many homeowners achieve excellent results. Take your time with the planning phase, invest in commercial-grade materials rather than the cheapest options, and remember that proper installation prevents problems for decades.
If you’d rather have professionals handle the work, we’re here to help. Our comprehensive approach means we can integrate edging into larger landscape projects, ensuring everything works together beautifully. For properties that need complete lawn renovation alongside new edging, check out our lawn installation services.
Your landscape deserves borders that perform as well as they look. With proper installing landscape edging techniques, you’ll spend less time fighting grass invasion and more time enjoying your outdoor spaces. Those clean lines and reduced maintenance? That’s the reward for doing it right the first time.
