In Ground Sprinkler Installation: 10 Powerful Tips for Success 2025
Why In Ground Sprinkler Installation Transforms Your Property
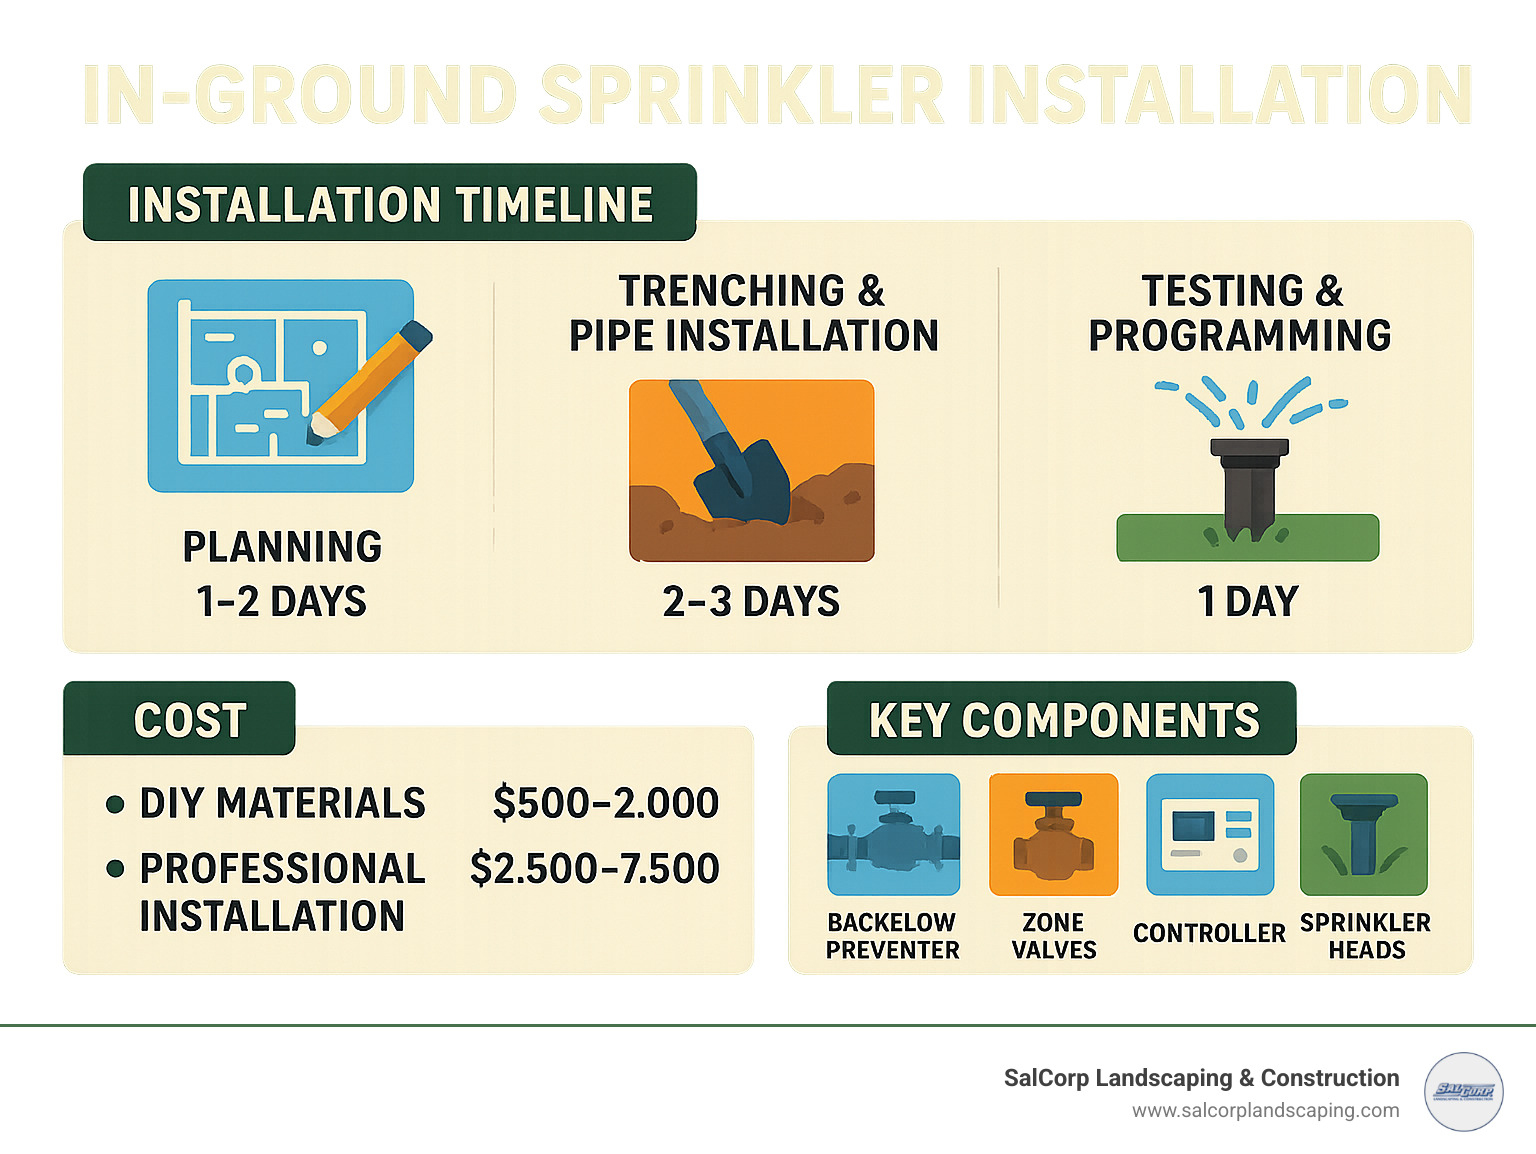
In ground sprinkler installation is the process of creating an automated underground irrigation system that delivers precise amounts of water to your lawn and landscaping. Here’s what the installation involves:
Essential Steps for In Ground Sprinkler Installation:
1. Plan and design – Map your yard, mark utilities, and calculate water needs
2. Measure water supply – Test pressure (30-75 PSI required) and flow rate
3. Dig trenches – Create 6-10 inch deep channels for pipes and wiring
4. Install components – Connect valves, pipes, sprinkler heads, and controller
5. Test and adjust – Check for leaks, program zones, and fine-tune coverage
The benefits are compelling. Professional installations typically cost homeowners between $2,500-$7,500 based on internet data, while DIY systems can run $500-$2,000. More importantly, automated sprinklers can reduce water usage by up to 33% compared to manual watering while ensuring consistent coverage.
The installation process typically takes 16-20 hours for a two-zone system covering 1,000-3,000 square feet. Most homeowners complete the project over a weekend, though trenching represents the most time-consuming phase.
I’m Sal Musto, owner of SalCorp Landscaping & Construction with over two decades of experience changing outdoor spaces across Massachusetts. Through countless in ground sprinkler installation projects, I’ve seen how proper irrigation systems create healthier landscapes while reducing maintenance headaches for busy property owners.
Essential in ground sprinkler installation terms:
– designing underground sprinkler system
– installing irrigation system for garden
– lawn sprinkler system setup
Plan, Evaluate & Design Your System
The most beautiful in ground sprinkler installation starts with smart planning, not fast digging. I’ve seen too many weekend warriors jump straight to trenching, only to find they’ve created a system that waters the sidewalk better than their lawn.
Start with a detailed yard sketch that captures everything permanent – your house, driveway, trees, flower beds, and that garden shed. This becomes your master blueprint. Don’t worry about artistic skills; a simple drawing with measurements works perfectly.
Your soil tells the watering story. Sandy soil drains like a sieve and needs frequent, shorter watering sessions. Clay soil holds water like a sponge but can become waterlogged easily. Walk around your property after a good rain – areas that dry out quickly need different attention than soggy spots.
Sun zones matter just as much. That sunny front lawn baking in afternoon heat has completely different needs than the shaded area under your maple tree. Mark these variations on your sketch because they’ll become separate irrigation zones.
Here’s where many DIY projects go wrong: head-to-head coverage. Each sprinkler should reach the next one in the spray pattern. This overlap eliminates those brown, dry patches that make your lawn look like a patchwork quilt.
Before you dig a single shovel full of dirt, call 811. This free utility marking service prevents you from turning your sprinkler project into an emergency plumbing or electrical repair. In Massachusetts, it’s not just smart – it’s the law.
Flow calculation determines everything else. Your water pressure and flow rate dictate how many sprinkler heads each zone can handle. We’ll dive deeper into measuring these critical numbers in the next section.
More info about designing your system layout for optimal performance.
Mapping Irrigation Zones
Think of zones as neighborhoods with similar needs. Your sunny front lawn becomes Zone 1, while the partially shaded backyard becomes Zone 2. That flower bed with different watering requirements? That’s Zone 3.
Valve locations need strategic thinking. Place your valve manifold somewhere accessible but out of the way – typically near your main water line but away from foot traffic. The manifold should sit at least 18 inches deep with a gravel base for proper drainage.
Coverage overlap prevents dry spots and ensures even water distribution. Each sprinkler should spray far enough to reach its neighbors, creating that crucial head-to-head coverage pattern.
Choosing Sprinkler Head Types
Rotary sprinklers handle the heavy lifting for larger lawn areas. These workhorses spray 16-24 feet with adjustable arcs from 40 to 360 degrees. When not running, they retract flush with the ground.
Pop-up spray heads excel in smaller spaces and tight corners. With spray distances of 8-15 feet, they’re perfect for narrow strips along walkways or between planted beds.
Drip emitters work magic in gardens and shrub areas. They deliver water directly to root zones with minimal evaporation loss, using about 50% less water than spray irrigation.
High-efficiency nozzles represent the latest advancement in sprinkler technology. These rotating stream nozzles create large water droplets that resist wind drift and reduce misting, cutting water usage by approximately 33% compared to traditional spray nozzles.
Measure Water Supply & Pick Components
Think of your home’s water supply as the foundation of your entire in ground sprinkler installation. Without adequate pressure and flow, even the best-designed system will disappoint you with weak spray patterns and uneven coverage.
Most homes enjoy water pressure between 40-70 PSI, which works perfectly for irrigation. However, your system needs at least 30-35 PSI to function properly – anything less results in droopy sprinkler heads that barely reach their intended coverage areas.
Your water meter size offers valuable clues about your system’s potential. Residential meters typically measure 5/8″, 3/4″, or 1″ – larger meters generally indicate higher flow capacity.
Here in Massachusetts, backflow prevention devices are required by code on all irrigation systems. These devices protect our drinking water supply from contamination. A pressure vacuum breaker (PVB) or reduced-pressure backflow preventer must be installed at least 12 inches above the highest sprinkler head in your system.
Choosing the right pipe material can make or break your installation’s longevity. Polyethylene pipe provides flexibility and superior freeze resistance, making it the smart choice for Massachusetts installations.
Smart controllers have completely changed the irrigation game. Wi-Fi-enabled units let you monitor and adjust your system from anywhere using smartphone apps. Weather-based controllers automatically modify watering schedules based on local conditions, potentially reducing water usage by 20-30%.
For comprehensive information about water conservation in outdoor irrigation, the EPA’s WaterSense program provides excellent scientific research on outdoor water use patterns and efficiency strategies.
Reading Your Water Pressure & Flow
Testing your water supply requires just basic tools and a few minutes of your time. Static pressure measurement uses a simple pressure gauge attached to an outdoor faucet. Turn off all water fixtures in your home, then read the gauge – most homes show 40-70 PSI.
Working pressure tells the real story of your system’s performance potential. With water flowing from the faucet, your pressure reading will drop. This working pressure represents what your sprinkler heads will actually receive during operation.
The bucket test reveals your flow rate using equipment you already own. Turn an outdoor faucet to full flow, time how long it takes to fill a 5-gallon bucket, then calculate: (gallons ÷ seconds) × 60 = gallons per minute (GPM).
Sizing Valves, Pipe & Zones
Proper component sizing prevents the pressure loss that turns strong sprinkler heads into disappointing drizzlers. Main supply lines typically require 3/4″ or 1″ pipe, while lateral lines serving individual heads can use 1/2″ or 3/4″ depending on the number of heads per zone.
Zone valve sizing must match your total flow requirements. A zone with four rotary heads requiring 3 GPM each needs a valve rated for at least 12 GPM, plus a safety margin.
| Pipe Material | Durability | Freeze Resistance | Cost | Best Use |
|---|---|---|---|---|
| PVC Schedule 40 | Excellent | Poor | Low | Main lines in warm climates |
| PVC Class 200 | Good | Poor | Very Low | Lateral lines, low pressure |
| Polyethylene | Good | Excellent | Medium | All lines in cold climates |
Step-by-Step In Ground Sprinkler Installation Guide
Now comes the exciting part – turning your carefully planned design into reality! The actual in ground sprinkler installation process transforms your yard systematically, zone by zone, until you have a fully automated irrigation system.
We always start with layout staking, which feels a bit like creating a treasure map across your property. Every sprinkler head location gets marked with colored flags, then we use spray paint to outline the trench routes connecting everything together.
The trenching phase is where the real work begins. Most in ground sprinkler installation projects in Massachusetts require trenches 6-10 inches deep, though areas with deeper frost lines might need 12 inches. The key is keeping those pipes protected from both freezing temperatures and the occasional enthusiastic lawn mower.
You’ve got choices when it comes to digging. Professional pipe-pulling machines can install main lines with surprisingly little surface disruption. But most DIY installations rely on good old-fashioned elbow grease with hand digging or rented trenching equipment.
Here’s a pro tip that’ll save you headaches later: sleeving under hardscape features like driveways and sidewalks during installation prevents future excavation nightmares. We install 3-4 inch PVC sleeves, or use water-pressure boring techniques to tunnel under existing concrete.

The valve manifold assembly requires attention to local codes, especially here in Massachusetts. Backflow preventers often need installation by licensed plumbers in many municipalities, so we coordinate this connection with qualified professionals when required.
Low-voltage wiring connects your zone valves to the controller, running through the same trenches as your water lines. We use 14-gauge direct-burial wire and always leave service loops at each valve for future maintenance.
Swing joints provide crucial flexibility between rigid pipe and sprinkler heads. These assemblies use flexible risers that bend rather than break when struck by mowers or foot traffic.
Before installing any sprinkler heads, we flush all lines thoroughly to remove construction debris. Running water through each zone for several minutes clears pipe shavings, dirt, and other contaminants that could clog those precision nozzles.
For comprehensive guidance on professional installation techniques, see our resource on Installing Underground Irrigation Systems.
In Ground Sprinkler Installation: Trenching Best Practices
Calling 811 isn’t just a good idea – it’s the law in Massachusetts. Underground utilities pose serious safety hazards and can create expensive repair bills if damaged. The free marking service typically responds within 2-3 business days.
Trench depth depends on local frost line requirements, which vary across Massachusetts from 30 inches in coastal areas to 48 inches inland. The good news? Irrigation pipes don’t need to be below the frost line if your system can be properly drained for winter. We typically dig 8-10 inches deep for protection and stability.
Pipe-pulling machines offer significant advantages over hand digging for main supply lines. These specialized tools can install 100 feet of pipe in the time it takes to dig 20 feet by hand.
In Ground Sprinkler Installation: Water Source & Backflow Connection
Tapping the main line requires shutting off water at the meter and installing a tee fitting. We typically connect near the water meter or at the first accessible point after the service line enters your property. This connection point needs a full-flow ball valve for system isolation.
Backflow preventer installation must comply with Massachusetts plumbing codes, which take water safety seriously. Most municipalities require either a pressure vacuum breaker (PVB) or reduced-pressure backflow preventer. The device must be installed at least 12 inches above the highest sprinkler head.
Professional installation of backflow preventers is often required by local codes. Many Massachusetts communities mandate licensed plumber installation for any connection to the potable water supply.
Testing, Programming & Fine-Tuning
The moment of truth arrives when you first turn on your newly installed system. Start by pressurizing each zone individually and walking the entire coverage area. Look for obvious leaks at pipe joints, valve connections, and around sprinkler heads.
Head alignment might seem like a minor detail, but it makes the difference between professional results and amateur appearance. Each pop-up sprinkler should sit perfectly flush with the ground surface when retracted.
Arc and radius adjustments transform your system from functional to fantastic. Most rotary heads adjust from 40 to 360 degrees, while spray heads offer various nozzle options for different coverage needs. The goal is complete lawn coverage without wasting water on driveways, sidewalks, or your neighbor’s property.
Controller programming starts simple but grows sophisticated as you learn your landscape’s needs. Modern smart controllers can seem overwhelming initially, but begin with basic scheduling and add features gradually. Most lawns need 1-2 inches of water weekly, including rainfall.
Seasonal water budgets represent one of the smartest features in modern controllers. Instead of reprogramming your entire schedule as seasons change, you simply adjust a percentage. Spring might use 70% of your base program, summer 120%, and fall 50%.
Rain sensor installation prevents the embarrassing scenario of sprinklers running during thunderstorms. These simple devices mount above your highest sprinkler head and interrupt watering when moisture is detected.

For detailed installation guidance from industry experts, check out How to Install an In-Ground Sprinkler System from This Old House.
Setting Up the Controller
Your controller is the brain of your in ground sprinkler installation, so proper programming ensures everything works smoothly. Start times should avoid peak household water usage – typically 6-9 AM and 5-8 PM.
Early morning watering (4-6 AM) works best for most situations. Plants absorb water efficiently, evaporation losses stay minimal, and wind interference is usually lowest.
Cycle and soak programming prevents runoff on slopes or clay soils that absorb water slowly. Instead of running each zone for 20 minutes straight, the controller runs 5 minutes, pauses 10 minutes for soil absorption, then repeats.
Wi-Fi-enabled controllers have revolutionized irrigation management. Smartphone apps let you adjust schedules from anywhere, monitor water usage, and receive alerts about system problems.
Performance Tweaks & Water Savings
Fine-tuning your system after installation can dramatically improve efficiency and results. Nozzle swaps offer the biggest impact for the smallest investment. Replacing standard spray nozzles with high-efficiency rotating stream nozzles can reduce water usage by up to 33% while improving coverage uniformity.
High-efficiency rotary heads deliver larger water droplets that resist wind drift and penetrate soil better than fine spray patterns. They’re particularly valuable in windy locations or where water conservation is a priority.
Seasonal adjustments maximize both efficiency and plant health. New plantings might need extra water during establishment, then reduced watering as root systems develop. The key to long-term success is patience during the adjustment period.
Maintenance, Costs & Future Upgrades
A well-maintained irrigation system can serve your property beautifully for 20-30 years, but like any mechanical system, it needs regular attention to perform at its best.
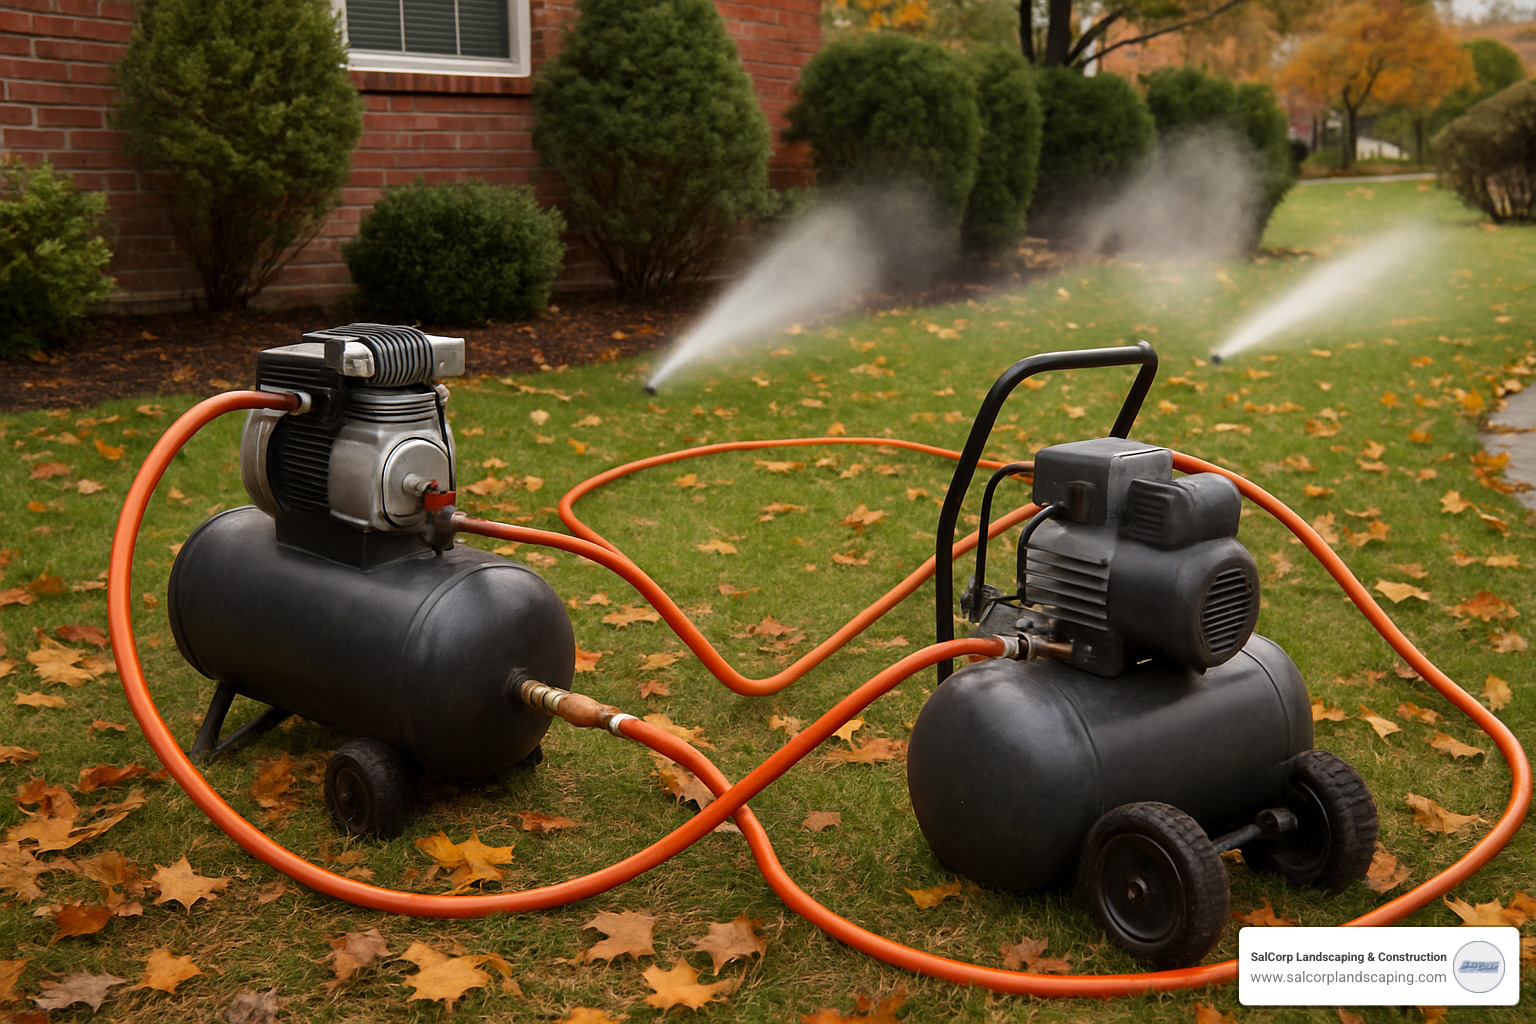
Winterization represents the most critical annual task for Massachusetts homeowners. Our freeze-thaw cycles can destroy an entire system overnight if water remains in the lines. We typically schedule blow-outs in late October or early November, before the first hard freeze.
The blow-out process uses compressed air at 50-100 PSI to force every drop of water from your system. We connect the compressor to your main supply line and work through each zone systematically.
Spring tune-ups breathe life back into your system after winter’s hibernation. We check for frost heave damage, clean debris from nozzles, and test each zone for proper coverage. Massachusetts frost can shift sprinkler heads and crack fittings, so this annual inspection catches problems before they waste water.
Understanding the investment helps with planning. Based on internet research, DIY in ground sprinkler installation projects typically cost between $500-$2,000 for basic systems, while professional installations range from $2,500-$7,500 depending on complexity and site conditions. These are average market costs and not specific pricing for SalCorp Landscaping & Construction.
Permit requirements vary across Massachusetts communities. Most municipalities charge $50-$200 for irrigation system permits, with some requiring licensed plumber connections that can add $300-$800 to project costs based on internet data.
Future expansion becomes much simpler with proper initial planning. When we design systems, we often install slightly oversized main lines and accessible valve manifolds. This foresight allows adding new zones later without reconstructing your entire system.
The latest smart sensor technology takes irrigation management to the next level. Soil moisture sensors prevent unnecessary watering when ground conditions don’t require it, while weather stations automatically adjust schedules based on local rainfall, temperature, and humidity.
For comprehensive irrigation services and maintenance programs, visit our More info about irrigation services page.

Frequently Asked Questions about In Ground Sprinkler Installation
After two decades of in ground sprinkler installation projects across Massachusetts, I’ve heard just about every question homeowners have about irrigation systems. Let me share answers to the three most common concerns.
How deep do I bury sprinkler pipes?
Here in Massachusetts, we typically bury irrigation pipes 8-10 inches deep, though the exact depth depends on your specific location and local conditions. If you’re near the coast where winters are milder, 6-8 inches often works fine. But if you’re inland where frost penetrates deeper, you might need to go down 12 inches.
Here’s something that surprises many homeowners: you don’t necessarily need to get below the frost line. What really matters is making sure your system can be properly drained for winter. With proper slope toward drain valves and a thorough compressed air blow-out each fall, you can prevent freeze damage regardless of burial depth.
Do I really need a backflow preventer?
Yes, absolutely – and it’s not optional. Massachusetts requires backflow prevention devices on all irrigation systems connected to your home’s water supply. This isn’t just bureaucratic red tape; it’s protecting everyone’s drinking water.
Think about what could happen without proper backflow prevention. Fertilizers, pesticides, or other chemicals in your irrigation system could potentially flow backward into the municipal water supply during pressure drops or system failures.
Most Massachusetts communities require annual testing of backflow preventers by certified technicians. This ensures the device keeps protecting the water supply and typically runs between $75-$150 per year based on internet data.
Can I add more zones later?
Absolutely, but smart initial planning makes future expansion much easier and far less expensive. When we design systems, we always think about tomorrow’s needs, not just today’s.
The secret is oversizing certain components from the start. We might install a 1-inch main line instead of 3/4-inch, even if your current needs don’t require it. We also choose controllers with extra zone capacity and position valve manifolds where they’re easily accessible.
Your water supply capacity ultimately determines how big your system can grow. There’s no point adding zones if your water pressure and flow can’t handle them. During initial design, we calculate total flow requirements to ensure your system has room to grow.
Conclusion
In ground sprinkler installation transforms properties in ways that go far beyond simple convenience. After helping hundreds of Massachusetts homeowners create efficient irrigation systems over the past two decades, I’ve seen how the right system delivers consistent, efficient watering that saves time, reduces water bills, and creates the kind of lush landscapes that make neighbors stop and take notice.
The investment pays dividends year after year. While the initial installation requires careful planning and proper execution, a well-designed system practically runs itself once programmed. No more dragging hoses around the yard on summer evenings or worrying whether your lawn is getting enough water during vacation weeks.
At SalCorp Landscaping & Construction, we take pride in our owner-operated approach. When you work with us, you get my personal attention from initial consultation through final system testing. We understand Massachusetts soil conditions and know which municipal codes apply to your specific location.
Water-efficient landscapes aren’t just good for your utility bills. They support environmental stewardship in our communities while creating outdoor spaces that improve property values. Modern irrigation technology makes it possible to use less water while achieving better results than ever before.
Whether you’re considering a DIY project or professional installation, quality components and proper design create systems that perform reliably for decades. The difference between a system that frustrates you and one that delights you often comes down to planning details and installation precision.
From Walpole to Newton, Wellesley to surrounding communities, we’ve helped property owners transform ordinary yards into extraordinary landscapes through thoughtful in ground sprinkler installation. Our comprehensive approach includes everything from initial site evaluation to seasonal maintenance programs that keep your system performing at peak efficiency.
Ready to stop worrying about watering and start enjoying your landscape? Let’s schedule a consultation to evaluate your property’s unique needs. We’ll design a system that delivers optimal performance while fitting your specific landscape goals and budget.
For more information about our complete lawn sprinkler services, visit More info about lawn sprinkler installation to find how we can help create the efficient, beautiful landscape you’ve always envisioned.
