What is Hydroseeding: Top 5 Incredible Benefits 2025

What is hydroseeding? At its core, hydroseeding is a modern method for planting grass efficiently and effectively. It involves using a slurry—a mixture made of water, seed, mulch, and fertilizer—that is sprayed evenly across the soil. This technique is known for providing rapid germination and a lush, uniform lawn without the higher cost of sod.
Importance of Hydroseeding:
- Cost-Effectiveness: Cheaper than sod, more efficient than traditional seeding.
- Erosion Control: The mulch in the slurry stabilizes the soil and retains moisture.
- Quick Germination: Grass sprouts within days, offering a quick green solution.
- Uniform Lawn Look: Seeds are spread evenly, reducing patchy growth common in traditional seeding methods.
As Sal Musto, I have dedicated over two decades to enhancing outdoor spaces through SalCorp Landscaping & Construction. My team’s hands-on experience with hydroseeding allows us to transform landscapes efficiently, benefiting both residential and commercial properties across Massachusetts. Let’s dive deeper into the fascinating process of hydroseeding, exploring its components and advantages.
Find more about what is hydroseeding:
– do it yourself hydroseeding
– how to prepare lawn for hydroseeding
– how much does hydroseeding a lawn cost
What is Hydroseeding?
Hydroseeding is a modern and effective method for planting grass. It uses a slurry—a mix of water, seed, mulch, and fertilizer—to create lush lawns quickly and efficiently. The slurry is sprayed evenly across the soil, ensuring a uniform and healthy lawn.
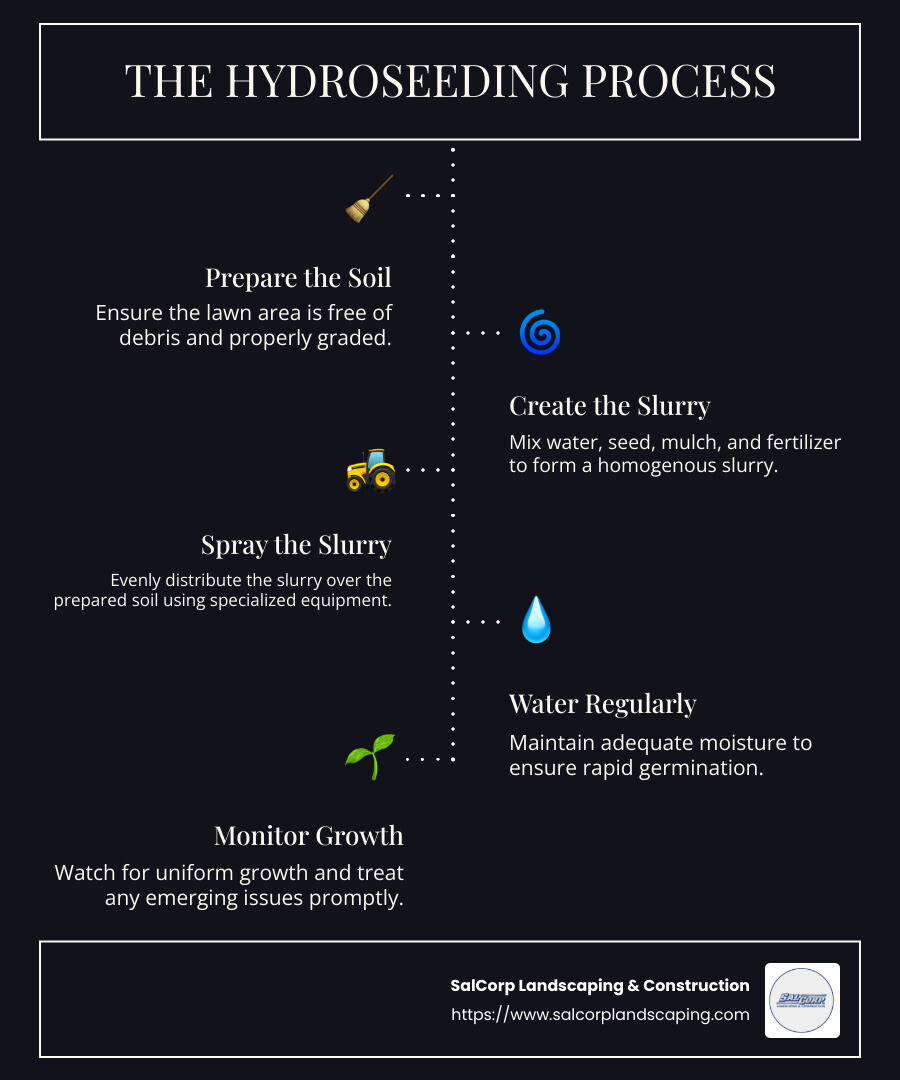
The Hydroseeding Process
The process begins with preparing the ground. This includes clearing the area of any debris and grading the soil to ensure a smooth surface. Once the ground is ready, the slurry is prepared in a hydroseeder, a specialized machine designed to mix and apply the slurry evenly over the ground.
- Soil Preparation: Clear debris and grade the soil to create a smooth surface.
- Mixing the Slurry: Combine water, seeds, mulch, and fertilizer in a hydroseeder.
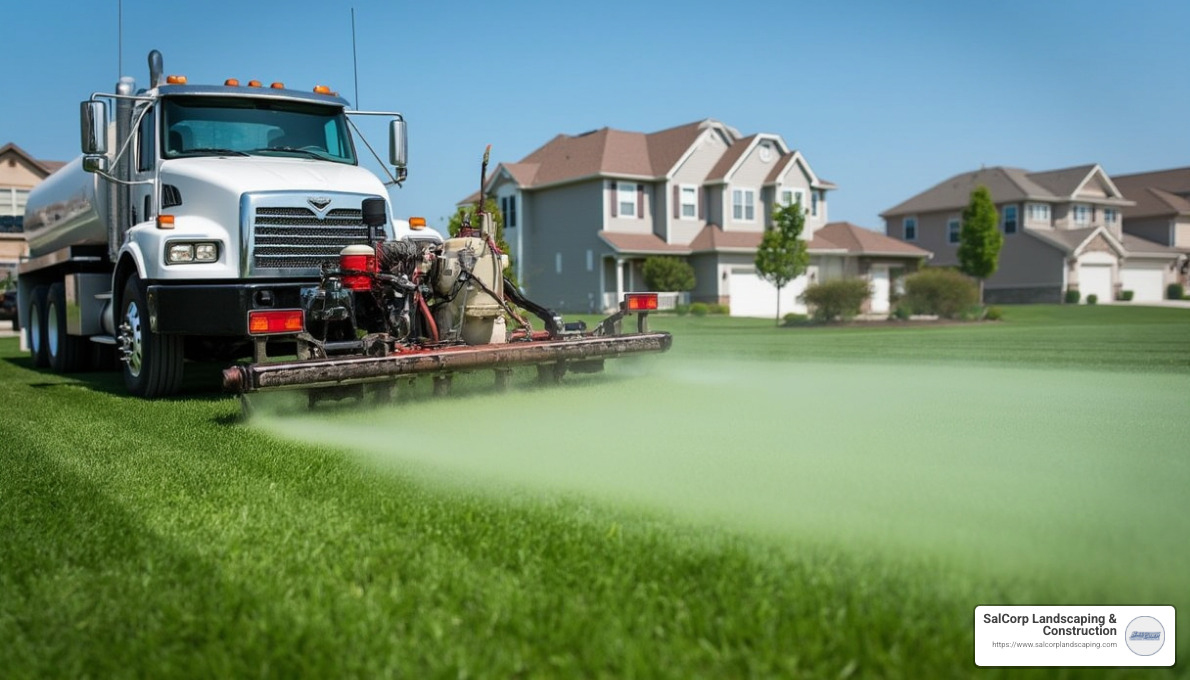
- Application: Spray the slurry evenly across the prepared soil using the hydroseeder.
Slurry Components
The slurry is a crucial part of the hydroseeding process. Here’s what goes into it:
- Grass Seeds: You can choose a single type or a blend of grasses, depending on your lawn’s needs.
- Mulch: This helps the seeds stick to the soil and protects them from harsh weather. Options include wood fiber, paper, blended, and bonded fiber matrix mulch.
- Fertilizer: Provides essential nutrients for seed growth.
- Water: Makes the slurry spreadable and helps keep the seeds moist for better germination.
Application Methods
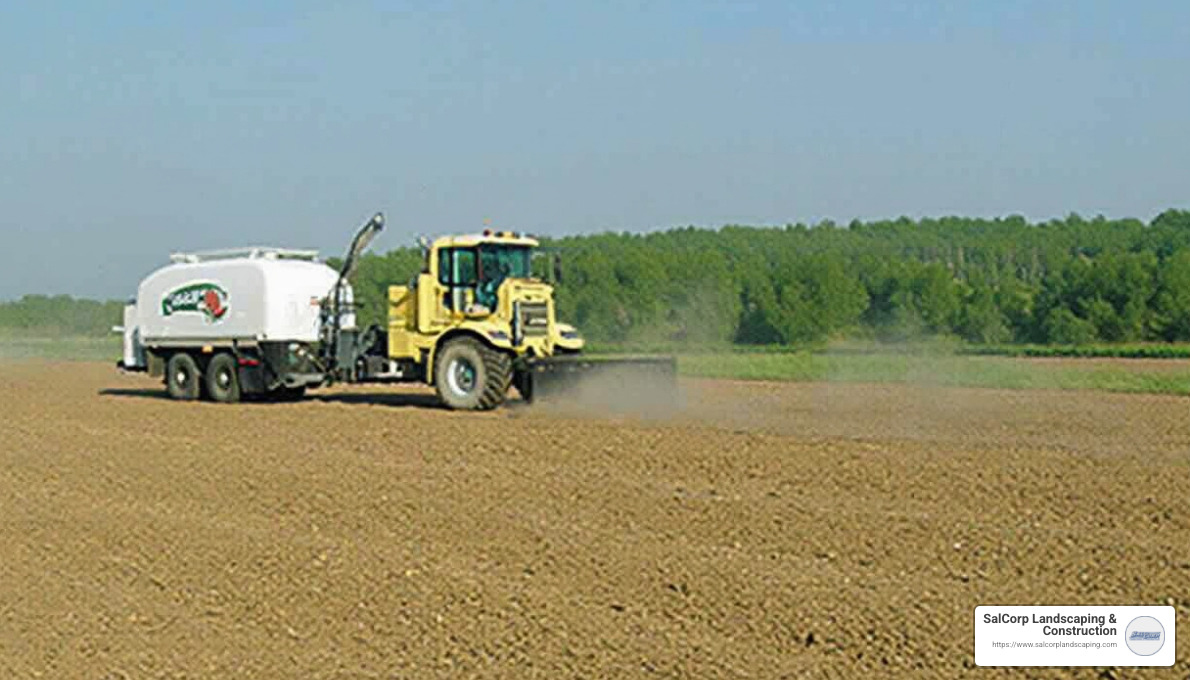
Hydroseeding is versatile and can be applied using different methods depending on the area size and terrain:
- Truck-Mounted or Trailer-Mounted Tanks: Ideal for large areas, ensuring the slurry is applied evenly.
- Helicopters or Aircraft: Used for large, hard-to-reach areas, such as after a forest fire to prevent erosion.
- DIY Kits: Available for homeowners wanting to tackle smaller areas themselves.
Hydroseeding offers a blend of efficiency and effectiveness, making it a popular choice for those seeking a quick, cost-effective way to establish a beautiful lawn. Now that we understand the process and components, let’s explore the benefits hydroseeding offers over other methods.
Benefits of Hydroseeding
Hydroseeding offers several compelling benefits, making it a popular choice for establishing lush lawns. Let’s explore these advantages in more detail.
Cost-Effectiveness
Hydroseeding is a budget-friendly alternative to sodding and traditional seeding. It’s particularly economical for large areas. According to industry data, hydroseeding can be up to 80% cheaper than laying sod. This cost-saving arises from lower material expenses and reduced labor requirements. With hydroseeding, fewer workers are needed, which means less time and money spent on labor.
Erosion Control
One of the standout benefits of hydroseeding is its ability to control erosion. The mulch in the slurry forms a protective mat over the soil, which holds moisture and prevents erosion from wind and rain. This makes it an excellent choice for areas prone to erosion, like slopes or regions with heavy rainfall. The tacky texture of the slurry also helps keep it in place, providing stability to the soil.
Quick Germination
The hydroseeding process accelerates germination, with grass often sprouting within a week. This rapid growth is due to the nutrient-rich slurry that provides seeds with everything they need to thrive. The mulch retains moisture, which is crucial for seed germination. In as little as 4 to 6 weeks, your lawn can be fully established and ready for its first mow.
Uniform Coverage
Hydroseeding ensures even distribution of seeds, mulch, and fertilizer, resulting in a uniform lawn. Unlike sodding, which can leave visible seams, or hand seeding, which may create bare patches, hydroseeding delivers seamless coverage. The slurry is sprayed evenly, creating a consistent and lush lawn without gaps or irregularities.
These benefits make hydroseeding an attractive option for homeowners and landscapers looking to establish a healthy, vibrant lawn efficiently and affordably. Next, let’s compare hydroseeding with other common methods of lawn establishment.
How Hydroseeding Works
Understanding how hydroseeding works involves diving into its key components: mulch, water, and the integration of seeds and fertilizers. Each plays a crucial role in creating a lush, green lawn.
The Role of Mulch
Mulch is a vital part of the hydroseeding process. It helps the seeds stick to the soil, protects them from harsh sunlight, and keeps them moist. Different types of mulch offer unique benefits:
- Wood Fiber Mulch: Known for being the most effective, wood fiber mulch is heavier and retains more water than other types. It’s perfect for lawns needing strong erosion control. Some brands even include tackifiers to keep everything in place until the grass takes root.
- Paper Mulch: This is the most affordable option, made from chopped-up newspaper. While it’s cost-effective, it doesn’t hold water as well as wood mulch. It’s best for flat areas without erosion concerns.
- Blended Mulch: A mix of wood fiber and paper, blended mulch offers a balance of affordability and performance. It’s typically 70% wood and 30% paper, providing good water retention and protection.
- Bonded Fiber Matrix Mulch: This mulch uses a special bonding agent to resist water, making it ideal for steep slopes. It forms a continuous layer that holds the soil in place and biodegrades into beneficial materials for plant growth.
The Importance of Water
Water is not just a carrier in the hydroseeding slurry; it plays a critical role in the success of the process.
- Moisture Retention: The mulch in the hydroseeding mixture holds water, keeping the seeds moist and promoting faster germination. This moisture retention is crucial during the first few weeks after application.
- Germination Acceleration: By keeping the seeds consistently moist, water accelerates the germination process. This leads to quicker grass growth, often within a week, and helps establish a lush lawn rapidly.
Seed and Fertilizer Integration
The integration of seeds and fertilizers in the hydroseeding slurry ensures that grass grows strong and healthy.
- Nutrient Supply: Fertilizers in the slurry provide essential nutrients that help seeds sprout and grow robustly. While the initial application gives seeds a good start, additional fertilization may be needed later to maintain lawn health.
- Seed Variety: One of the advantages of hydroseeding is the ability to customize the seed mix. You can choose grass types that thrive in your specific climate or soil conditions. Mixing seed varieties can also increase disease resistance and ensure a more resilient lawn.
By understanding these components, you can see why hydroseeding is an efficient and effective method for establishing a lawn. Next, let’s compare hydroseeding with other common methods of lawn establishment.
Comparing Hydroseeding to Other Methods
When considering how to establish a lush, green lawn, it’s important to weigh the pros and cons of different methods. Let’s compare hydroseeding with sod and traditional seeding to help you make an informed decision.
Hydroseeding vs. Sod
Speed: Sod provides an instant lawn. You can walk on it almost immediately after installation. In contrast, hydroseeding requires patience. You’ll see grass sprouting in about a week, but it takes 4 to 6 weeks to be fully established.
Cost: Hydroseeding is generally more cost-effective than sod. According to various online sources, sod can be up to four times more expensive because it includes the cost of growing, harvesting, and transporting fully-grown grass. These are average costs and not actual costs for SalCorp Landscaping.
Natural Appearance: A hydroseeded lawn often looks more natural than sod. Sod can sometimes have visible seams that give an artificial appearance. Hydroseeding allows grass to grow directly in your soil, creating a seamless look.
Maintenance Needs: Sod is less hardy than hydroseeded grass. It can suffer from disease and root establishment issues. Hydroseeded lawns, once established, tend to be more disease-resistant and durable.
Hydroseeding vs. Traditional Seeding
Uniformity: Hydroseeding offers more uniform coverage than traditional seeding. This is because the slurry evenly distributes seeds, mulch, and fertilizer, resulting in a lush, even lawn. Traditional seeding can lead to patchy growth.
Convenience: Hydroseeding is more convenient than traditional seeding. The process is quicker and less labor-intensive, covering large areas efficiently with a sprayer. On the other hand, traditional seeding can be time-consuming and requires more manual labor.
Water Usage: Hydroseeding requires more water initially to ensure proper germination and establishment. Traditional seeding also needs watering, but not as much in the early stages.
Expense: Traditional seeding is the cheapest option upfront. However, the time, effort, and potential for patchy growth might make hydroseeding a better investment in the long run. It’s important to note that these are average costs based on internet data and not actual costs for SalCorp Landscaping.
By understanding these differences, you can choose the method that best fits your needs, budget, and timeline. Next, let’s dive into some practical tips for making the most of hydroseeding.
Practical Tips for Hydroseeding
Best Time to Hydroseed
Timing is everything when it comes to hydroseeding. The best seasons for hydroseeding are spring and fall. These times of year offer cooler temperatures and more consistent rainfall, which are ideal for seed germination. Spring is particularly advantageous due to the increased likelihood of rain, reducing the need for frequent watering. However, ensure there’s no risk of frost before starting.
In the summer, hydroseeding can be challenging due to the heat. You’ll need to water more frequently to keep the seeds moist. Avoid winter as grass typically lies dormant in cold weather, making it a poor choice for growth.
DIY Hydroseeding
If you’re up for a challenge, you can tackle hydroseeding on your own. Here’s a simple step-by-step guide to get you started:
- Gather Equipment: You’ll need a hydroseeder or a rental machine from a local hardware store. Renting can cost around $300 per day, but prices can vary widely.
- Prepare the Soil: Conduct a soil test to check pH levels. Adjust with lime or sulfur if necessary. Clear the area of any debris and loosen the topsoil for better seed contact.
- Mix the Slurry: Combine grass seeds, mulch, water, and fertilizer in the hydroseeder. Choose a seed blend suited to your climate and lawn needs.
- Apply the Slurry: Spray the mixture evenly across the prepared soil. Ensure full coverage to avoid patchy growth.
- Watering: Keep the area moist by watering 3 times a day for 10-20 minutes each session. This is crucial in the first few weeks to ensure successful germination.
- Maintenance Post-Application: After 4 to 6 weeks, reduce watering to once a day for 30 minutes. Begin mowing when the grass reaches about 3 inches in height. Use a push mower to avoid damaging new seedlings.
DIY hydroseeding can be rewarding, but it requires attention to detail and commitment to watering and care. For best results, consider hiring professionals who can bring expertise and equipment to the task.
Now that you have these practical tips, you’re ready to start your hydroseeding journey. Next, we’ll address some frequently asked questions about hydroseeding to clear up any lingering doubts.
Frequently Asked Questions about Hydroseeding
Can I hydroseed over an existing lawn?
While it’s technically possible to hydroseed over an existing lawn, it’s not recommended. The slurry used in hydroseeding can harm or even kill your current grass. If you’re dealing with a patchy lawn, consider overseeding instead. This involves spreading grass seed directly onto the existing lawn, allowing new grass to grow in thin areas without damaging what’s already there.
How much does hydroseeding cost?
Hydroseeding is known for being cost-effective, especially when compared to sod. While specific pricing can vary, you can generally expect the cost to range from 8 to 20 cents per square foot, based on internet data. For a typical 5,000 square foot lawn, that would mean costs ranging from $400 to $1,000. That these are average costs and actual prices can vary depending on factors like location, labor, and materials. It’s always best to get a personalized estimate from a professional service.
How to maintain a hydroseeded lawn?
Maintaining a newly hydroseeded lawn is crucial for achieving lush, green results. Here are some key steps:
- Watering: Keep the lawn moist by watering 2 to 3 times a day for the first month. Each session should last about 10-20 minutes. After the first month, you can reduce watering frequency, but ensure the soil remains consistently moist.
- Limit Foot Traffic: Try to keep off the grass until it’s well-established, which usually takes about 5 weeks. This helps prevent damage to the young seedlings.
- Mowing: Once the grass reaches 3 to 4 inches in height, you can start mowing. Be careful to only cut one-third of the grass height to avoid stressing the young plants.
- Fertilizing: About 30 days after hydroseeding, apply a starter fertilizer to promote growth. This gives the grass the nutrients it needs to thrive through the growing season.
Following these maintenance tips will help ensure your hydroseeded lawn grows healthy and vibrant.
Conclusion
Hydroseeding offers long-term benefits that can transform your landscape into a lush, green oasis. This method is not only cost-effective but also environmentally friendly, making it a smart choice for homeowners and businesses alike.
Long-term Benefits
One of the standout advantages of hydroseeding is its ability to establish a healthy lawn quickly. The process facilitates rapid germination and strong root development, resulting in a dense, uniform grass cover. This robust growth helps in reducing soil erosion and improving soil quality over time. Plus, a well-established lawn can increase your property’s curb appeal and value, offering a solid return on investment.
SalCorp Landscaping & Construction
At SalCorp Landscaping & Construction, we pride ourselves on delivering top-notch hydroseeding services custom to your specific needs. Our expertise in landscape design and our commitment to using high-quality materials ensure that your lawn will thrive. Being an owner-operated business, we offer personalized service with a focus on sustainability and efficiency. Our team is equipped with the latest machinery to provide quick and effective solutions for your outdoor space.
Environmental Impact
Hydroseeding is a greener alternative to traditional methods like sodding. The slurry used in hydroseeding is nontoxic and poses no threat to wildlife, pets, or children. By promoting the use of native grasses, hydroseeding supports local ecosystems and reduces the need for chemical treatments. Additionally, the process improves water conservation by improving soil moisture retention, which means less watering is needed over time. Choosing hydroseeding is a step towards a more sustainable landscape.
In summary, hydroseeding is a versatile and eco-friendly method to achieve a beautiful lawn. With the expertise of SalCorp Landscaping & Construction, you can enjoy a vibrant, healthy landscape that benefits both you and the environment.
